
Desserts
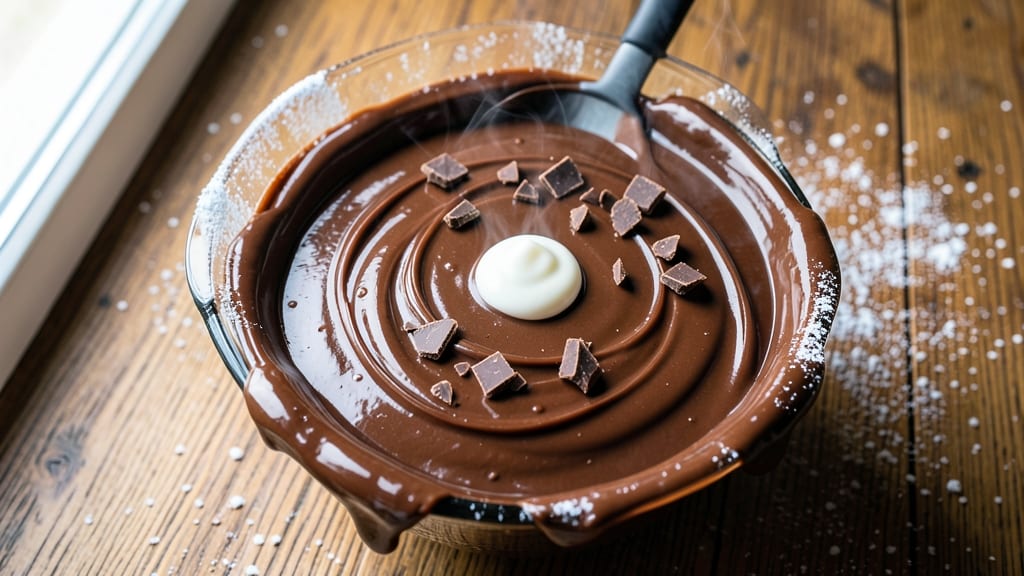
This Cadbury chocolate icing recipe delivers a velvet-smooth, spreadable frosting that transforms any cake into a showstopper. The secret lies in melting Cadbury chocolate with butter and cream for a silky texture—no lumps, no graininess, just pure, rich decadence.
I developed this recipe after years of testing, ensuring it’s stable enough for piping but still luxurious enough to eat straight from the spoon.
What sets this icing apart is its versatility—thin it with milk for a glossy glaze or thicken it with powdered sugar for sturdy decorations. The recipe balances richness with structure, so it holds its shape on tiers or drizzles elegantly over cupcakes.
For an extra touch, I often fold in a hint of mint extract or orange zest, but the classic version is already irresistible.
The process is straightforward: melt the chocolate gently, whisk in the butter and cream until silky, then adjust consistency to your preference. This icing stays fresh in the refrigerator for up to a week, making it perfect for prepping ahead.
Whether you’re covering a birthday cake or adding a glossy finish to cookies, this recipe guarantees professional results every time.
For added flair, dust with cocoa powder or sprinkle crushed chocolate for texture. The possibilities are endless, but the foundation—smooth, rich, and foolproof—remains the same. Let’s get decorating!
Ingredients for cadbury chocolate icing
Eight ingredients transform into a silky, velvety chocolate icing perfect for decorating.
| Ingredient | Amount | Notes |
|---|---|---|
| Cadbury Dairy Milk Chocolate Bars 🍫 | 8 oz | High-quality, chopped into small pieces |
| Unsalted Butter 🧈 | ½ cup | Room temperature for smooth mixing |
| Heavy Whipping Cream 🥛 | 1 cup | Cold for best stability |
| Powdered Sugar 🍚 | 2 cups | Sifted for lump-free texture |
| Vanilla Extract 🌿 | 1 tsp | Pure, high-quality extract |
| Pinch of Salt 🧂 | ⅛ tsp | Enhances chocolate flavor |
| Milk 💧 | ¼ cup | For adjusting consistency |
| Cocoa Powder 🍫 | ¼ cup | Optional for extra richness |
Cadbury Dairy Milk is the star here—look for full bars, not chips, and chop them yourself for the smoothest texture. Trader Joe's or Whole Foods often carry the best quality, but any UK Cadbury will work. Butter should be at room temperature (about 68°F)—press it to test. The cream needs to be cold to prevent the icing from curdling. For the powdered sugar, Domino brand is my go-to since it's finely sifted and lump-free. If you can't find Cadbury, Hershey's Special Dark or Lindt Excellence work well too, though the flavor will differ slightly.
No heavy cream? Whipped coconut cream gives a similar texture, though it's slightly lighter. Short on powdered sugar? Confectioners' sugar from a squeeze bottle works perfectly—no measuring needed. Want extra richness? Add 2 oz more chocolate and reduce the milk by the same amount. The vanilla extract is non-negotiable for depth, but if you're out, 1/4 tsp vanilla bean paste works too. For a mint twist, add 1/2 tsp peppermint extract (reduce milk by 1 tbsp to balance). The cocoa powder is optional but adds a deeper chocolate flavor—use Dutch-process for smoother results.
This icing stays fresh in the fridge for up to 1 week, covered tightly. For longer storage, freeze in 1-tbsp portions—thaw at room temperature before using. To prevent graininess, always melt the chocolate gently over a double boiler, stirring constantly. If it thickens too much, whisk in 1 tsp warm milk at a time. For a glossy finish, brush the top with a tiny bit of milk before dusting with cocoa powder or crushed chocolate. The icing is ready when it holds its shape when piped but still spreads easily.
Why You'll Love This Recipe
- Three-Ingredient Magic: I swear by this—just melt chocolate, whip cream, and fold. No fancy techniques, no stress. The butter and cream blend so smoothly, you’ll wonder why you ever bothered with complicated recipes.
- Decadent in Seconds: That first bite? Rich, velvety, with a whisper of vanilla cutting through the Cadbury’s signature milkiness. Honestly, the powdered sugar sweetens it just enough to make it irresistible without being cloying.
- Birthday Cake Hero: Slather it on cupcakes, drizzle over cake layers, or even spread on toast for a lazy Sunday treat. Between us, it’s my go-to for last-minute celebrations—no one ever guesses it took me 15 minutes.
- Leftovers? Better Than New: This icing keeps for days in the fridge, thickens perfectly when reheated, and tastes even better the second time around. I’ll be real: I’ve made a batch just to snack on with a spoon. (Yes, even on a Tuesday night.)
Step-by-step instructions for Cadbury chocolate icing
Here's the professional method for creating a velvety, professional-grade chocolate spread that will elevate any cake decoration.
Melt the Chocolate and Butter Together
Place the 8 oz Cadbury Dairy Milk Chocolate Bars, chopped into small pieces, and the 0.5 cup unsalted butter in a heatproof bowl set over a saucepan of simmering water. Keep the heat at a gentle simmer to create a double boiler effect. Stir occasionally with a silicone spatula until both the chocolate and butter melt completely and the mixture becomes smooth and glossy.
You'll know it's ready when the mixture reaches 110°F on a candy thermometer and has a shiny, satiny appearance. Remove the bowl from the heat immediately to prevent overheating, which can cause the chocolate to seize. Let it cool slightly for 2-3 minutes while you prepare the next ingredients.
Whip the Cream and Sugar Mixture
In a separate, chilled mixing bowl, combine the 1 cup cold heavy whipping cream, 2 cups powdered sugar, 1 tsp vanilla extract, and 0.125 tsp pinch of salt. Using an electric mixer on medium-high speed, whip the mixture until it forms soft peaks that hold their shape when the whisk is lifted. This should take about 2-3 minutes of continuous whipping.
Here's the thing—cold cream whips better and holds its structure longer. If you notice the mixture isn't thickening properly, place the bowl in the refrigerator for 5 minutes to chill before attempting to whip again. The sugar should dissolve completely during this process, creating a smooth, lump-free base.
Combine Chocolate and Cream Mixtures
With the mixer running on low speed, gradually pour the melted chocolate mixture into the whipped cream base. Add the 0.25 cup cocoa powder and 0.25 cup milk while continuing to mix on low speed. This gradual addition prevents the cream from deflating. Once fully incorporated, increase the speed to medium and continue mixing for 1-2 minutes until the icing reaches a smooth, spreadable consistency.
You'll notice the icing thicken as it comes together. If it becomes too thick, add 1 tablespoon of milk at a time until it reaches a smooth, pipeable consistency. The final texture should be thick enough to hold its shape when piped but still smooth enough to spread easily across cake surfaces.
Rest and Adjust Consistency
Transfer the icing to an airtight container and refrigerate for at least 30 minutes before using. This resting period allows all the ingredients to fully meld together, resulting in a more stable and professional finish. During this time, the icing will thicken slightly, making it easier to work with for decorating.
If you find the icing is still too thick after resting, thin it with additional milk or heavy cream, 1 teaspoon at a time, until you achieve the desired consistency. For a glossy finish, you can brush the top of your decorated cake with a small amount of milk or cream after applying the icing. This creates that beautiful, professional sheen that makes all the difference.
Pro Tips For Making Cadbury Chocolate Icing
- CHOP CHOCOLATE SMALL: Chop the Cadbury bars into tiny, even pieces—think rice-sized—not big chunks. I learned this the hard way after ending up with streaks of unmelted chocolate in my icing. A sharp knife or food processor works best, and don’t skip this step if you want silky smoothness.
- MELT BUTTER SLOW: Use low heat to melt the butter with the chocolate—medium-high will burn it before the chocolate even softens. I’ve seen this happen more times than I’d like to admit. A double boiler or microwave in 20-second bursts keeps things under control.
- WHIP CREAM COLD: Chill your heavy whipping cream and bowl before whipping—room temperature cream turns into butter faster than you can say "disaster." My grandmother swore by this, and she was right: the icing stays light and fluffy instead of heavy and grainy.
- SIFT THE SUGAR: Sift the powdered sugar before mixing—it cuts out lumps and makes the icing smoother. I skip this when I’m lazy, but the difference in texture is noticeable, especially if you’re piping or spreading it. A quick shake in a fine-mesh sieve does the trick.
Storing and reheating your leftovers
Refrigerator Storage
Store your Cadbury chocolate icing in an airtight container lined with plastic wrap to prevent drying or absorbing fridge odors. I use glass containers with snap-on lids—they’re sturdy and won’t crack if you accidentally leave it in too long.
Keep it chilled at 40°F or below for up to 7 days while maintaining its velvety texture. The icing thickens slightly in the fridge, which is perfect for piping, but it remains spreadable with a quick whisk. 🧊
Freezer Storage
For longer storage, portion the icing into 1-tablespoon servings using a piping bag or small silicone molds. Freeze in a single layer on a tray lined with parchment paper to prevent sticking, then transfer to a freezer bag with all air squeezed out.
Label with the date—it stays fresh for up to 3 months without losing flavor or texture. To thaw, let it sit at room temperature for 15-20 minutes, then whisk gently to restore smoothness. ❄️
Reheating for Spreadability
If your icing thickens too much after refrigeration, revive it by whisking in 1 teaspoon of warm milk at a time until it reaches a smooth, pipeable consistency. For a quicker fix, microwave it in 10-second bursts on low power, stirring between each burst.
Avoid overheating—just enough to loosen the texture. If it’s too thin, chill for 10 minutes to firm up slightly. Always taste before using to adjust sweetness or richness. 🔥
Room-Temperature Use
Let the icing sit at room temperature for 10-15 minutes before using if it’s been chilled. This softens it slightly for easier spreading or piping. If your kitchen is warm, place the container in a cool water bath (like an ice water bath) for 5 minutes to slow down melting.
For decorating, work quickly—icing softens faster in warm environments. A cooling rack underneath the cake helps maintain stability while you apply the icing. ✨
Reviving Grainy Texture
If your icing develops a grainy texture, don’t toss it! Simply place the container in a microwave-safe bowl and heat for 10 seconds on low power, then whisk vigorously until smooth. The heat reactivates the fat in the butter and cream, restoring that silky finish.
For stubborn lumps, strain the icing through a fine-mesh sieve for a flawless, professional result. This trick saves the day when time is tight! 💫
Nutrition facts
Frequently asked questions
Can I substitute Cadbury chocolate with another brand?
Yes, but the flavor will differ slightly. For best results, use Hershey's Special Dark or Lindt Excellence chocolate bars—both melt smoothly and provide rich cocoa depth. Avoid milk chocolate chips, as they contain stabilizers that can make the icing grainy. If using cocoa powder instead, reduce the amount by 1/4 cup to prevent overpowering the flavor.
Why did my icing turn grainy?
Graininess usually happens from overheating the chocolate or not cooling it properly between steps. Always melt chocolate over a double boiler at 110°F max, and let it cool slightly before mixing with cream. To fix grainy icing, whisk in 1 tsp warm milk or strain through a fine-mesh sieve for a silky finish.
How do I make this icing vegan?
Replace the butter with vegan butter or coconut oil, use coconut cream instead of heavy cream, and swap powdered sugar for confectioners' sugar (check for vegan labels). For chocolate, use Enjoy Life or Lindt 99% Cacao bars. The texture will be slightly lighter but still spreadable. Add 1 tbsp aquafaba to stabilize it.
Can I use this icing for cupcakes instead of cakes?
For cupcakes, you’ll want a slightly thinner consistency—whisk in an extra 2 tbsp milk until it flows smoothly when piped. Use a Wilton 1M tip for swirls or a star tip for rosettes. Chill the cupcakes for 10 minutes first to set the frosting faster.
What’s the secret to a glossy finish?
After applying the icing, brush the top with a tiny bit of milk or cream using a pastry brush. This creates a mirror-like sheen. For extra shine, dust with cocoa powder or crushed chocolate while the icing is still slightly wet. Work quickly in a cool environment to prevent melting.