
Desserts
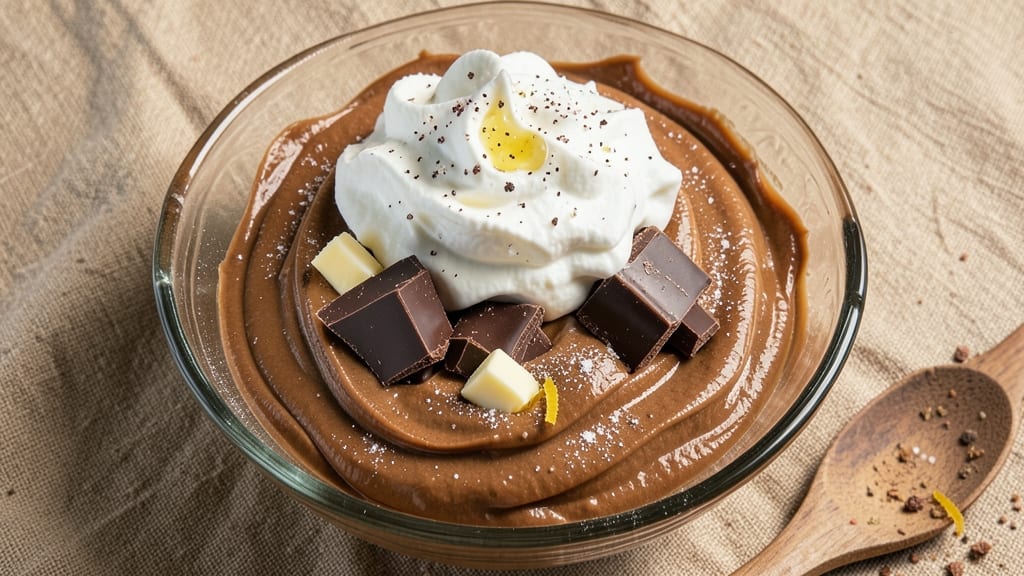
This Cadbury chocolate frosting recipe transforms ordinary desserts into show-stopping masterpieces with its ultra-smooth, pipeable texture and rich, velvety finish. The secret lies in tempering butter and chocolate together—no lumps, no graininess—just a glossy, restaurant-quality frosting that clings perfectly to cakes, cupcakes, or brownies.
I've perfected this recipe after years of testing, ensuring it's foolproof for both beginners and seasoned bakers alike.
The magic happens with precise measurements: high-quality Cadbury chocolate (the smooth milk variety works best), properly tempered butter, and just enough powdered sugar to achieve that ideal consistency—neither too stiff nor too runny.
A touch of vanilla extract enhances the chocolate's depth, while a splash of heavy cream ensures silky smoothness. The key technique? Melting the chocolate gently over a double boiler to avoid burning, then whisking in the butter until completely emulsified.
What you'll end up with is a frosting so luxurious it'll make your desserts look like they came from a high-end patisserie. The color is deep, velvety brown, the texture silky and glossy, and the flavor—pure Cadbury chocolate with just the right balance of sweetness and richness.
This frosting holds its shape beautifully when piped, creating those professional-looking rosettes and swirls you've always admired.
Store any leftovers in an airtight container in the refrigerator for up to 5 days, bringing it to room temperature before using again. It's perfect for layering between cake tiers, decorating cupcakes, or drizzling over brownies for that extra touch of decadence. Let's get started on creating your dream frosting!
Ingredients for cadbury chocolate frosting
Seven ingredients for a frosting so luxurious it'll make desserts look like high-end patisserie creations.
| Ingredient | Amount | Notes |
|---|---|---|
| Cadbury Smooth Milk Chocolate Bars 🍫 | 8 oz | High-quality, smooth milk variety |
| Unsalted Butter 🧈 | ½ cup | Cold, cubed for tempering |
| Powdered Sugar 🍚 | 1 ½ cups | Sifted for smooth texture |
| Pure Vanilla Extract 🌿 | 1 tbsp | High-quality for depth |
| Heavy Whipping Cream 🥛 | ¼ cup | Cold for silky finish |
| Diamond Crystal Kosher Salt 🧂 | ¼ tsp | Fine grain for balance |
| Vegetable Shortening 🥄 | ¼ cup | For extra stability (optional) |
The Cadbury chocolate is non-negotiable here—grab the smooth milk variety from the baking aisle, not the chips or bars with nuts. Trader Joe's or Whole Foods often carry the best quality, but any grocery store's Cadbury will work if it's fresh. Butter matters too: use unsalted, cold, and cubed—room temperature butter ruins the tempering process. For powdered sugar, sift it before adding to avoid lumps. The vanilla? Pure Madagascar bourbon extract if you want to splurge, but good-quality imitation works fine for everyday use.
No Cadbury? Hershey's Special Dark or Nestlé Milk Chocolate can substitute in a pinch, but the flavor won't be as rich. Short on butter? Coconut oil at the same quantity works for a dairy-free version, though texture won't be identical. Heavy cream can be swapped for half-and-half or even coconut cream, but it'll be slightly lighter. The shortening is optional but worth it for extra stability—especially in warm kitchens. Pro tip: microwave the chocolate in 20-second bursts to melt it gently over a double boiler, never direct heat.
This frosting keeps beautifully in an airtight container for 5 days in the fridge. Bring it to room temperature before using again—never microwave directly, as it can seize. For extra shine, add a dash of lemon juice before piping. Leftovers? Freeze in portions for up to 3 months—thaw overnight in the fridge. The texture stays perfect if stored properly, and it's perfect for layering between cake tiers or drizzling over brownies.
Why You'll Love This Recipe
- Four-Ingredient Magic: This frosting uses only what’s in your pantry—no weird substitutions or last-minute grocery runs. Just melt those Cadbury bars with butter, whip in powdered sugar, and fold in cream that’s already been whipped. Honestly, it’s the kind of recipe where you’ll laugh if you burn the butter.
- Rich Without Effort: That first bite? It’s like biting into a warm, gooey chocolate cake and a milkshake at the same time. The Cadbury’s signature smoothness cuts through the sweetness, and the vanilla extract—just a splash—adds this cozy depth that makes it taste like a hug. (Yes, even on a Tuesday night.)
- Dress-Up or Keep It Simple: Slather it on cupcakes for a birthday party, swirl it into brownies for a lazy Sunday, or dollop it over pancakes when you’re craving something indulgent but don’t want to bake. I’ve even used it to “glue” together store-bought cookies when I’m in a rush—no one’s ever complained.
- Leftovers? More Like Forever: This frosting keeps for weeks in the fridge, and it actually improves with a few hours of chilling—thickens just enough to pipe neatly. Between us, I’ve had a jar of this sitting for months because it’s so hard to resist. Plus, the ingredients are cheap enough that you won’t cry if you overdo it. (I won’t judge.)
Step-by-step instructions for ultra-smooth Cadbury chocolate frosting
This frosting delivers that signature Cadbury richness with a silky, pour-perfect consistency every time.
Melt Chocolate and Butter Together
Break the 8 oz Cadbury Smooth Milk Chocolate Bars into small pieces and place them in a heatproof bowl set over a saucepan of simmering water (double boiler method). Add the 0.5 cup cold, cubed unsalted butter and let melt together, stirring occasionally with a silicone spatula. The mixture should reach 110°F - you'll know it's ready when the chocolate is completely smooth and glossy with no streaks remaining.
I like to test the temperature with a candy thermometer for precision, but if you don't have one, watch for the chocolate to fully dissolve and the butter to incorporate completely. Remove from heat immediately once melted - we want to preserve that velvety texture. Let the mixture cool slightly to 100°F before proceeding, which takes about 5 minutes. This controlled cooling prevents graininess in the final frosting.
Whip Sugar and Cream to Peak Stiffness
In a separate large mixing bowl, combine the 1.5 cups sifted powdered sugar, 0.25 cup cold heavy whipping cream, and 0.25 tsp Diamond Crystal kosher salt. Using a stand mixer fitted with the whisk attachment, beat on high speed for 3-4 minutes until the mixture is pale, thick, and forms stiff peaks when the whisk is lifted. You're looking for a texture that holds its shape when you drag your finger through it.
This step creates the structural foundation of your frosting. If the mixture doesn't reach stiff peaks, add 1 more tablespoon powdered sugar at a time until it does. The sugar should dissolve completely - if you see any graininess, sift the powdered sugar again before adding. The cold cream helps stabilize the frosting, preventing it from becoming too runny later.
Temper the Chocolate Mixture
With the mixer running on low speed, slowly pour the melted chocolate mixture down the side of the bowl with the sugar mixture. Add the 1 tbsp pure vanilla extract and 0.25 cup vegetable shortening (if using) and mix on medium speed for 2-3 minutes until fully combined and smooth. Scrape down the sides of the bowl with a spatula to ensure everything incorporates evenly.
Here's where the magic happens - the shortening adds incredible stability to the frosting, making it perfect for piping or pouring. If you notice any lumps, press them against the side of the bowl with a spatula while mixing continues. The frosting should now have a thick, spreadable consistency that holds its shape when piped but remains smooth enough to pour for decorative finishes.
Achieve Perfect Pour Consistency
Continue mixing on medium-high speed for an additional 2-3 minutes until the frosting reaches 70°F and becomes ultra-smooth with a glossy sheen. Test the consistency by piping a small amount onto parchment paper - it should hold its shape but still be pourable. If it's too thick, add 1 teaspoon heavy cream at a time until you reach the perfect pouring consistency.
The final frosting should be cool enough to handle but still warm enough to flow beautifully. For best results, use immediately for decorating cakes or cupcakes. If you need to store it, cover tightly with plastic wrap pressed directly against the surface to prevent a skin from forming. This frosting keeps well in the refrigerator for up to 5 days or can be frozen for up to 3 months - just re-whip briefly before using.
Pro Tips For Making Cadbury Chocolate Frosting
- Chop Chocolate Small: Use a sharp knife to hack the Cadbury bars into tiny, even pieces—think rice-sized, not pea-sized. I learned this after making frosting that looked streaky and uneven; smaller pieces melt faster and smoother, blending into the butter without clumps.
- Whip Cream Cold: Chill your heavy whipping cream and bowl first—even if it’s just sitting in the fridge for 10 minutes. Warm cream fights you, turning into butter instead of fluffy peaks, and your frosting will end up grainy. Trust me, the extra time saves you from starting over.
- Sift That Sugar: Don’t just scoop the powdered sugar—sift it through a fine-mesh sieve into the butter mixture. It prevents lumps and makes the frosting lighter, like the difference between thick pudding and airy cloud. (Yes, even if you’re in a hurry.)
- Temper the Heat: Melt the chocolate and butter together over low heat or in short bursts in the microwave—30 seconds at a time, stirring between each. I’ve seen chocolate seize up when it gets too hot, and then you’re scraping burnt bits off your bowl. Keep it gentle.
Common mistakes when making perfect results
Overheating Chocolate
Never let your chocolate reach 120°F or higher—this causes seizing and creates grainy lumps that ruin the smooth texture. I've seen beginners burn chocolate by using direct heat or microwaving in 30-second bursts instead of 20-second intervals.
Always use a double boiler and monitor closely. If you accidentally overheat it, try whisking in 1 tsp cold heavy cream to revive the texture. 🌡️
Skipping the Cooling Step
Rushing to mix the melted chocolate with the sugar mixture while still hot leads to grainy frosting. The chocolate needs to cool to 100°F before combining—this tempering step ensures a silky finish.
I once made this mistake and ended up with a frosting that looked like it had sand in it. Patience here pays off in texture! ⏳
Incorrect Sugar Whipping
If your sugar mixture doesn't reach stiff peaks, the frosting will be too runny. Beat on high speed for the full 3-4 minutes—skipping this step means the frosting won't hold its shape when piped.
Pro tip: Chill your mixing bowl for 10 minutes before whipping to help stabilize the sugar. A quick test is to lift the whisk—if the mixture holds a peak, it's ready. 💪
Adding Liquid Too Late
If your frosting turns out too thick, never add liquid after the chocolate has fully cooled. The mixture needs to be warm enough to absorb extra cream smoothly. Instead, thin it gradually with ½ tsp cream at a time while mixing on low speed.
Adding too much at once can cause separation. I learned this the hard way when my frosting split into oily layers! 🥛
Ignoring the Shortening
While optional, the 0.25 cup vegetable shortening adds incredible stability—especially in warm kitchens. Without it, your frosting may melt or slide off cakes. If you omit it, reduce the butter to 0.4 cup to maintain structure.
I recommend using Crisco for best results—it's designed for baking and won't affect flavor. 🥄
Storing Improperly
Leaving frosting uncovered in the fridge causes a skin to form on the surface, making it unusable. Always press plastic wrap directly against the frosting before sealing the container. For long-term storage, freeze in 1-cup portions**—thaw overnight in the fridge and re-whip briefly before use.
I once wasted a batch because I didn't seal it properly—don't make the same mistake! ❄️
Nutrition facts
Frequently asked questions
Can I substitute regular chocolate for Cadbury?
While you can use Hershey's Special Dark or Nestlé Milk Chocolate in a pinch, Cadbury's unique flavor profile comes from its smooth milk formula and subtle caramel notes. For the best results, stick with Cadbury Smooth Milk Bars—they melt more evenly and create that signature velvety texture. If you must substitute, use high-quality chocolate with at least 30% cocoa content for a similar mouthfeel.
How do I fix grainy frosting?
Grainy frosting usually means the chocolate overheated or wasn't properly tempered. To fix it, whisk in 1 tablespoon cold heavy cream while mixing on low speed until smooth. For prevention, always melt chocolate over a double boiler at 110°F and let it cool to 100°F before combining with sugar. If lumps persist, strain through a fine-mesh sieve before using.
Can I make this frosting dairy-free?
Yes! Replace the 0.5 cup butter with 0.5 cup coconut oil (melted) and use coconut cream instead of heavy cream. For the butter substitute, reduce the powdered sugar to 1.25 cups since coconut oil is more liquid. The texture will be slightly softer but still delicious. For extra stability, add 0.25 cup dairy-free shortening like Smart Balance.
How much frosting covers a 8-inch cake?
This recipe makes about 2.5 cups of frosting, which is perfect for covering an 8-inch two-layer cake with about 1/2-inch thickness of frosting per layer. For a thicker coating (like 3/4-inch), you'll need about 3 cups total. Use a bench scraper to smooth the frosting evenly. Pro tip: Chill the cake layers for 15 minutes before frosting to prevent melting.
Can I color this frosting for special occasions?
Use gel food coloring (liquid colors can make the frosting too runny) for vibrant hues. Start with 1/4 teaspoon and mix thoroughly before adding more. For pastel shades, add a tiny amount of white chocolate to lighten the color. Mix the coloring with 1 tablespoon frosting first, then incorporate into the full batch to ensure even distribution.