
Desserts
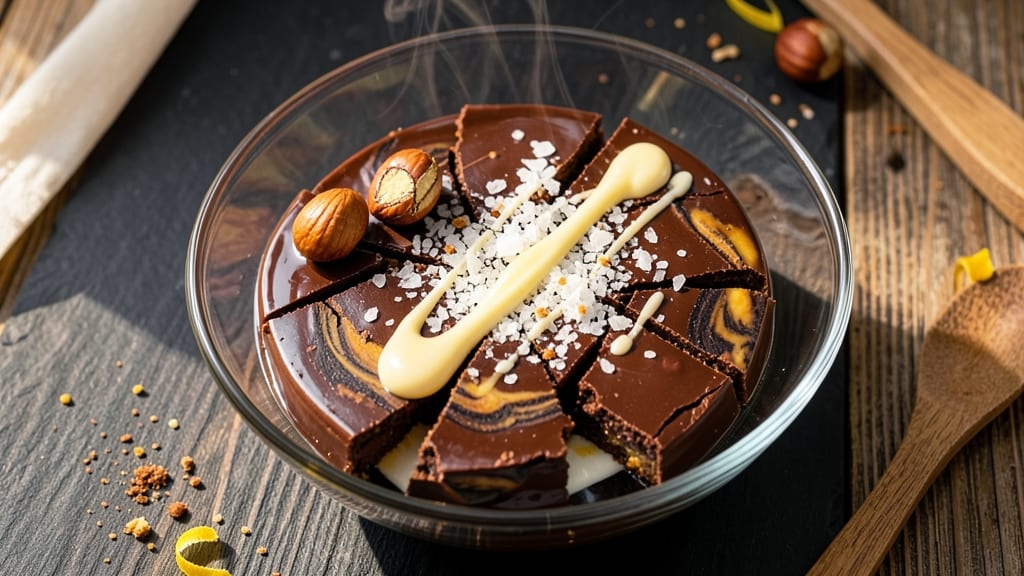
Belgian chocolate bars deliver that perfect balance of crispy top and fudgy core that makes them irresistible. This recipe captures the essence of Belgian chocolate-making traditions—rich, smooth, and deeply satisfying—using simple techniques you can master at home.
The secret lies in tempering the chocolate just right to achieve that signature snap while keeping the center velvety and decadent.
What sets these bars apart is the combination of high-quality chocolate, a touch of butter for richness, and optional mix-ins like nuts or citrus zest for depth. Unlike store-bought versions, this recipe lets you control the texture and flavor, ensuring every bite lives up to Belgian standards.
The process is straightforward but requires patience—melting, tempering, and setting the chocolate properly is key to that restaurant-quality result.
Once you’ve mastered the technique, you’ll have a batch of chocolate bars that shine with a crispy shell and melt-in-your-mouth center, perfect for gifting, sharing, or indulging solo. The bars keep beautifully in the fridge for up to a week, making them ideal for meal prep or holiday treats.
Whether you prefer dark, milk, or white chocolate, this recipe adapts effortlessly to your taste.
Ready to elevate your chocolate game? The instructions walk you through every step—from melting the chocolate to shaping and setting the bars—so you can achieve professional results without the fuss. Let’s get started!
Ingredients for belgian chocolate bar
High-quality chocolate and simple mix-ins create Belgian-style bars with crispy shells and fudgy centers.
| Ingredient | Amount | Notes |
|---|---|---|
| High-Quality Belgian Chocolate Chips 🍫 | 12 oz | Dark, milk, or white (70% cocoa or higher preferred) |
| Unsalted Butter 🧈 | 4 tbsp | European-style preferred for flavor |
| Heavy Cream 🥛 | ¼ cup | Whole milk fat for richness |
| Granulated Sugar 🍚 | ¼ cup | Fine grain for smooth texture |
| Vanilla Extract 🌿 | 1 tsp | Pure Madagascar preferred |
| Salt 🧂 | ¼ tsp | Fine sea salt for balance |
| Optional Mix-Ins 🥜 | ½ cup | Chopped nuts, citrus zest, or sea salt flakes |
| Silicon Chocolate Mat 📄 | 1 whole | For crispy top (or parchment paper) |
| Dark Chocolate Chips 🍫 | ¼ cup | For topping (optional) |
The chocolate is everything here—Belgian brands like Callebaut or Guittard deliver that signature snap and melt. Grab 70% dark or higher for the best balance of crisp and fudge. Butter matters too: European-style unsalted (like Plugrá or Kerrygold) adds depth. Heavy cream should be full-fat—none of that skim nonsense. For mix-ins, toasted hazelnuts or orange zest elevate flavors, but keep it simple if you're a purist. Pro tip: check expiration dates on chocolate—older bars temper poorly.
No Belgian chocolate? Valrhona or Lindt are solid substitutes. Short on butter? Coconut oil at half the amount works in a pinch, but texture won't be identical. The vanilla extract can be swapped for seeds from one vanilla bean if you're feeling fancy. For mix-ins, crushed pretzels or flaky salt add fun textures. And if you're using parchment paper instead of a silicone mat, lightly grease it with cocoa butter to prevent sticking. The chocolate chips on top? Only if you want extra crunch—skip them for a smoother finish.
Once set, these bars keep for 1 week in the fridge or 3 months in the freezer (wrap tightly!). Store in an airtight container with parchment between layers to prevent sticking. For gifting, cut into smaller squares and package in cellophane bags tied with ribbon. The crispy top softens at room temp, so let bars sit for 10-15 minutes before serving. Pro move: make a double batch—they disappear fast.
Why You'll Love This Recipe
- No-Fuss Indulgence: I swear by this recipe because it’s the kind of dessert that feels like a treat but only takes one bowl and 10 minutes of hands-off time. Just melt the butter and cream, toss in the Belgian chocolate chips, and stir—no fancy techniques, no stress.
- Rich Without Effort: That first bite? Chef’s kiss. The Belgian chocolate’s deep, caramel-like notes melt into something velvety, while the vanilla and sugar balance it just enough to keep it from being too heavy. Honestly, it’s the kind of flavor that makes you forget how little work went into it.
- Party or Pajamas: I’ve served these at holiday gatherings (they disappear fast) and as midnight snacks with a cup of coffee (also fast). The bars cut cleanly, store well, and even hold up when wrapped in parchment—no fancy plating needed.
- Leftovers That Last: Between us, I always make a double batch. These stay fresh for at least a week in the fridge, and freezing them extends that to months. Plus, the ingredients are simple—no specialty items—so it’s a splurge-worthy dessert that won’t break the bank.
Step-by-step instructions for Belgian chocolate bars
Here's how to create bars with that perfect crispy top and fudgy center we all crave.
Melt Chocolate and Butter Together
In a heatproof bowl set over a saucepan of simmering water, combine the 12 oz high-quality Belgian chocolate chips and 4 tbsp unsalted butter. Stir gently until both are completely melted and smooth, creating a glossy chocolate mixture. Remove the bowl from heat immediately to prevent overheating—this ensures your chocolate doesn't seize or lose its rich flavor.
Here's the thing—Belgian chocolate has a lower melting point than milk chocolate. I like to test the temperature by dipping a spoon in the mixture; when it slides off cleanly without any streaks, you know it's ready. If you see any graininess, strain the mixture through a fine-mesh sieve to achieve that perfect silky texture.
Whisk in Sugar, Cream, and Seasonings
Return the melted chocolate to low heat and whisk in the 0.25 cup granulated sugar, 0.25 cup heavy cream, 1 tsp vanilla extract, and 0.25 tsp salt. Heat just until the sugar dissolves completely—you're aiming for a temperature around 115°F, which creates that signature fudgy texture. Remove from heat once everything is fully incorporated and smooth.
This is where the magic happens. The sugar helps create the fudgy center, while the cream adds richness. I always use pure Madagascar vanilla extract here—it makes a noticeable difference in the final flavor. If you're using optional mix-ins like chopped nuts or citrus zest, fold them in now using a silicone spatula, making sure they're evenly distributed.
Pour into Prepared Pan
Line a 9x13-inch baking pan with the silicon chocolate mat or parchment paper, ensuring it extends slightly over the edges for easy removal. Pour the chocolate mixture evenly into the prepared pan, using a spatula to spread it into an even layer. Tap the pan gently on the counter to release any air bubbles—this prevents unsightly pockets when you cut the bars later.
For that perfect crispy top, I've found it's crucial to spread the mixture evenly. Any thick spots will result in uneven baking, while thin spots might not crisp properly. If you're using the 0.25 cup dark chocolate chips for topping, sprinkle them lightly over the surface now before the next step.
Bake to Crispy Perfection
Bake in a preheated 325°F oven for 20-25 minutes, or until the edges are set but the center still looks slightly soft. The top should develop a beautiful crackly crust while maintaining a fudgy center underneath. Your oven might run hot, so start checking at the 20-minute mark—you want that crispy texture without burning the top.
Don't walk away during this step. The chocolate can go from perfect to burnt in just a few minutes. When you pull them out, the center should still have a slight wobble—this ensures that fudgy texture we're after. Let the bars cool completely in the pan before attempting to cut them, as the chocolate needs to fully set for clean slices.
Chill and Cut for Clean Slices
Transfer the pan to a wire rack and let the bars cool completely at room temperature for 1 hour, then refrigerate for 30 minutes to firm up completely. This chilling step is crucial—it allows the chocolate to set properly so you get clean, professional-looking slices when you cut them.
Use a sharp knife or pizza cutter to cut the bars into 12 equal squares. For the cleanest cuts, dip the knife in hot water between cuts and wipe it dry—this prevents the chocolate from sticking. Store any leftovers in an airtight container at room temperature, though I promise these won't last long!
Pro Tips For Making Belgian Chocolate Bar
- Temper Your Chocolate: Belgian chocolate melts at 110–115°F—any hotter and it seizes into a grainy mess. Use a double boiler or microwave in 20-second bursts, stirring between each, until smooth. I learned this the hard way after turning a perfect batch into chocolate grits.
- Whisk the Cream Cold: Heavy cream should be chilled before whipping—room temp makes it split like a bad soufflé. Pop the bowl in the freezer for 10 minutes first, then whip until stiff peaks form. Trust me, your bars won’t collapse later.
- Skip the Overmixing: Once you fold in chocolate, stop stirring the second everything’s combined. Overworking the mixture introduces air, which can make your bars look dull and crack unevenly. Rough is fine—smooth is overkill.
- Chill in Layers: Pour the mixture into a lined pan, then refrigerate for 1 hour before freezing. This prevents warping and gives you clean slices. I used to freeze straight from room temp—my bars looked like modern art, not dessert.
Troubleshooting great belgian chocolate bar
Chocolate Seizing
If your chocolate mixture suddenly turns grainy or lumpy, it's seized from water or overheating. This happens when moisture gets in or temperatures exceed 118°F. To fix it, whisk in 1 tsp coconut oil or 1 tbsp heavy cream while gently reheating over low heat—this helps restore smoothness.
Always use a double boiler for melting and keep the heat at a simmer, never a boil. 💡
Uneven Crispy Top
Thin spots in your crispy top? You likely spread the chocolate too thinly or baked at too high a temperature. Aim for a ¼-inch thick layer and use 325°F—any hotter risks burning before crisping.
For extra insurance, sprinkle 1 tsp cocoa powder over the surface before baking to enhance crispiness. Also, check your oven's accuracy with an oven thermometer—many run hotter than set. ✨
Fudgy Center Missing
If your bars are crispy all the way through, you may have baked too long or used too much sugar. The center should remain slightly soft when done. To adjust, reduce baking time by 2-3 minutes next time and ensure your sugar is fully dissolved (no graininess).
For extra fudginess, add 1 tbsp corn syrup to the mixture before baking—it helps retain moisture. 🔥
Sticky Bars After Cutting
Chocolate sticking to your knife or pan? Your bars weren't chilled long enough. Always refrigerate for 30 minutes after cooling at room temperature. For cutting, dip your knife in hot water, wipe dry, and cut quickly—this prevents sticking.
Store bars in an airtight container with parchment paper between layers to maintain crispness. 💫
Chocolate Not Setting Properly
If your chocolate stays too soft or doesn't hold shape, it wasn't tempered correctly. Belgian chocolate needs to be heated to 115°F and cooled to 88°F to crystallize properly. For a quick fix, place the pan in the fridge for 10 minutes to firm up, then return to room temperature.
To prevent this, work in a cool kitchen (below 75°F) and avoid handling the mixture too much. 🌡️
Burnt Edges
Burnt edges mean your oven runs hot or you baked too long. Always preheat your oven for 15 minutes and use an oven thermometer to confirm 325°F. If your oven runs hot, reduce the temperature by 25°F and check bars at the 18-minute mark.
For extra protection, line your pan with a silicone baking mat—it reflects heat better than parchment. 🔥
Nutrition facts
Frequently asked questions
Can I substitute regular chocolate for Belgian chocolate?
While you can use it, Belgian chocolate has a lower melting point and higher cocoa content, which creates that signature crispy snap. For best results, opt for Valrhona or Callebaut—they mimic Belgian quality. If using standard chocolate, reduce baking time by 2 minutes to prevent over-crisping.
Why does my chocolate turn grainy when melting?
This happens when moisture (like steam) gets in or the temperature exceeds 118°F. Always use a double boiler and keep heat at a simmer. To fix graininess, whisk in 1 tsp coconut oil while reheating gently. Never microwave chocolate—it burns easily!
How do I get the perfect crispy top without burning?
Spread the chocolate to a ¼-inch thickness and bake at 325°F for 20-22 minutes. Use an oven thermometer—many ovens run hot! For extra crispiness, sprinkle 1 tsp cocoa powder on top before baking. Check edges at 18 minutes to avoid over-browning.
Can I make these bars without baking?
Yes! For a no-bake version, spread the chocolate mixture into a pan, chill for 2 hours in the fridge, then cut into bars. Skip the crispy top by omitting baking entirely. Store in an airtight container for up to 1 week. The texture will be softer but still rich and fudgy.
What’s the best way to store homemade chocolate bars?
Keep them in an airtight container at room temperature for 3 days or refrigerate for up to 1 week. For long-term storage, freeze for 3 months. Always separate layers with parchment paper to prevent sticking. Let bars sit at room temp for 10 minutes before serving—they soften beautifully!