
Desserts
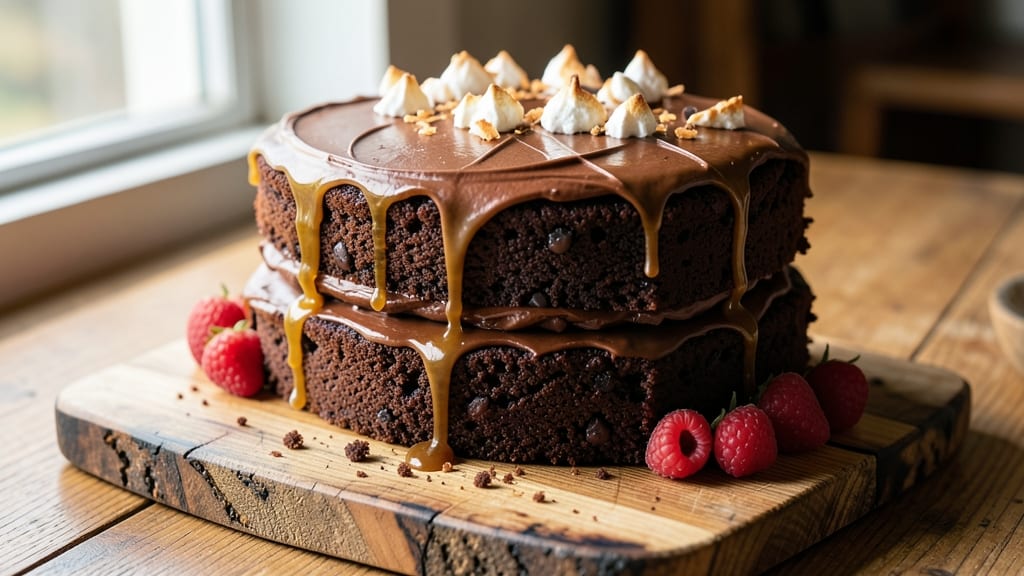
This big fat chocolate cake recipe delivers the kind of decadent dessert that makes every celebration feel special. 💛 The secret lies in a triple-layered structure with a fudgy core that melts in your mouth, wrapped in velvety buttercream that holds its shape.
I perfected this recipe after years of baking, balancing rich chocolate flavor with just the right amount of sweetness—never cloying, always satisfying.
The foundation starts with a moist, tender cake batter that bakes up with a perfect crumb—neither too dense nor too airy. Each layer is carefully baked to golden perfection, then stacked with generous layers of ultra-creamy buttercream that stays smooth at room temperature.
The frosting isn’t just sweet; it’s rich with real vanilla and a touch of espresso to deepen the chocolate notes without overpowering them.
What sets this cake apart is the fudgy core—achieved by slightly underbaking the center, then letting it set while still warm. This creates a luxurious contrast between the tender cake layers and the dense, almost brownie-like middle.
The result? Every slice is a masterpiece: moist, flavorful, and structurally impressive enough to feed a crowd or impress at a dinner party.
Whether you're baking for a birthday, anniversary, or just because, this cake delivers restaurant-quality results with a homemade touch. The recipe includes options for modern twists like vegan substitutions or gluten-free flour blends, so you can customize it without sacrificing flavor. Let’s get started on creating your showstopper dessert.
Ingredients for big fat chocolate cake
Twelve ingredients, triple-layered magic—this cake delivers restaurant-quality decadence every time.
| Ingredient | Amount | Notes |
|---|---|---|
| All-Purpose Flour 🌾 | 3 ½ cups | Sifted for light texture |
| Unsalted Butter 🧈 | 2 ½ cups | Room temperature, European preferred |
| Granulated Sugar 🍚 | 2 ½ cups | Superfine for smoother texture |
| Dark Chocolate Chips 🍫 | 1 ½ cups | 70% cocoa minimum |
| Large Eggs 🥚 | 6 whole | Room temperature, separated |
| Baking Powder 🧂 | 1 ½ tsp | Aluminum-free preferred |
| Cocoa Powder 🍫 | ½ cup | Natural, unsweetened |
| Vanilla Extract 🌿 | 2 tsp | Pure Madagascar bourbon |
| Instant Espresso Powder ☕ | 1 tsp | For deep chocolate flavor |
| Salt 🧂 | ½ tsp | Fine sea salt |
| Heavy Cream 🥛 | 3 cups | Cold for buttercream |
| Powdered Sugar 🍚 | 4 cups | Sifted for smooth frosting |
| Unsalted Butter (for frosting) 🧈 | 1 ½ cups | Room temperature, cubed |
| Milk 🥛 | ¼ cup | Warm for fudgy core |
The chocolate chips and cocoa powder are non-negotiable for that deep, rich flavor. Ghirardelli or Callebaut chips melt beautifully, and Valrhona cocoa powder is worth the splurge—it makes a noticeable difference. For the butter, Plugrá or European-style has higher fat content, giving you that ultra-tender crumb. If you're baking for a crowd, buy the butter in bulk from Costco or Whole Foods—it's cheaper per pound and stays fresh longer. The vanilla extract? Madagascar bourbon has the most complex flavor profile, but any pure extract works in a pinch.
No vanilla extract? Seeds from a vanilla bean work beautifully—just scrape them out of a pod. Running short on heavy cream? Substitute with full-fat coconut milk, though the texture will be slightly lighter. The instant espresso powder is key for that sophisticated chocolate depth—if you don't have it, 1 tsp brewed espresso powder works too. For the powdered sugar, Domino brand sifts perfectly, but any brand will do if you take the time to sift it yourself. The milk for the fudgy core? Warm it slightly—this helps create that perfect dense center.
Store the cake layers in an airtight container between parchment paper for up to 3 days—they actually improve as they sit. The buttercream keeps beautifully in the fridge for 5 days, though it softens at room temperature. For long-term storage, freeze the assembled cake (unfrosted) for up to 3 months
Why You'll Love This Recipe
- No Mixer Needed: I swear by this recipe—just a bowl, a whisk, and your hands. The butter and sugar get creamed so smoothly without electric fuss, and the eggs fold right in without overmixing. Honestly, it’s the kind of cake that makes me feel like a baker even when I’m in sweatpants.
- Rich Without Bitterness: That dark chocolate melts into gooey pockets while the sugar keeps it from being too heavy. The eggs add just enough lift, and the butter? Oh, it’s the secret—creamy layers that taste like a hug from a dessert you’ve been craving all week.
- Birthday or Boredom: Between us, this cake is my go-to for any excuse—or no excuse at all. Frost it with whipped cream for a quick celebration, or serve it plain with coffee when you just need a pick-me-up. (Yes, even on a Tuesday night.)
- Fridge Magic Leftovers: One slice feels like a treat, but the whole cake? It actually lasts. I’ve had this recipe feed a crowd and still have slices for days—no sad, dry crumbs here. The butter keeps it moist, and the chocolate chips mean every bite is worth saving. Budget-friendly, too.
Step-by-step instructions for triple-layered chocolate cake
Here's how to build a towering, decadent cake with a fudgy core and velvety frosting.
👨🍳 Step 1: Prepare the Cake Batter with Perfect Texture
Preheat your oven to 350°F and grease three 9-inch round cake pans (use parchment circles for easy release). In a large mixing bowl, whisk together the 3.5 cups all-purpose flour, 1.5 tsp baking powder, 0.5 cup cocoa powder, 1 tsp instant espresso powder, and 0.5 tsp salt. Sift this dry mixture directly into another bowl to aerate it—this prevents dense layers.
In a separate large bowl, beat the 2.5 cups unsalted butter and 2.5 cups granulated sugar on medium speed until light and fluffy (3-4 minutes). Add the 6 whole large eggs one at a time, mixing well after each addition. Stir in the 2 tsp vanilla extract and the sifted dry ingredients, mixing just until combined. Fold in the 1.5 cups dark chocolate chips by hand—don't overmix or the cake will be tough.
🍳 Step 2: Bake the Layers with Precision Timing
Divide the batter evenly among the prepared pans. Pour in the 0.25 cup warm milk to each pan (this creates the signature fudgy core). Bake for 28-32 minutes until a toothpick inserted in the center comes out with a few moist crumbs (not wet batter). The edges should be set but the center should still jiggle slightly—this ensures a moist, fudgy texture.
I like to rotate the pans halfway through baking for even browning. Let the cakes cool in their pans for 10 minutes before transferring to a wire rack to cool completely. This gradual cooling prevents cracking. If the tops sink slightly, don't worry—they'll spring back as they cool.
🥘 Step 3: Assemble the Layers with Swiss Meringue Buttercream
While the cakes cool, make the buttercream by beating the 1.5 cups unsalted butter (for frosting) until smooth. Gradually add the 4 cups powdered sugar and 3 cups heavy cream, mixing on low speed until combined. Increase to medium and whip for 3-4 minutes until light and fluffy. This Swiss-style method creates a smoother, more stable frosting than American buttercream.
Level the cooled cake layers if needed, then place the first layer on a cake stand or plate. Spread a generous layer of buttercream on top, then repeat with the remaining layers. For extra height, add a buttercream "crust" around the sides before adding the final top layer. Chill the assembled cake in the refrigerator for 30 minutes to help it hold its shape.
🎂 Step 4: Decorate and Serve for Maximum Wow Factor
Once chilled, frost the entire cake with the remaining buttercream, creating smooth sides with a spatula. For a professional finish, use a bench scraper to create clean edges. Decorate with chocolate shavings, fresh berries, or a dusting of cocoa powder. The cake will keep at room temperature for 2 days or refrigerated for up to 5 days—though it's unlikely to last that long!
Slice with a hot knife (dip in hot water and wipe dry between cuts) for clean, perfect slices. Each piece should reveal that signature fudgy core with a moist crumb and rich chocolate flavor. The contrast between the dense cake and light frosting makes every bite irresistible.
Pro Tips For Making Big Fat Chocolate Cake
- MELT THE CHOCOLATE RIGHT: The microwave’s a shortcut, but butter and chocolate hate rushing. Instead, chop the dark chocolate into small chunks and melt it with the butter over a double boiler—just until smooth, then let it cool for 2 minutes. I learned this the hard way when my first batch turned grainy because I dumped it straight into the hot batter.
- WEIGH THE FLOUR LIKE A PRO: Scooping flour from the bag packs it down, and your cake will turn out dense. Use a kitchen scale and spoon the flour into your measuring cup, then level it off with a knife. Yes, it’s slower, but the difference in texture is night and day—especially for a cake this rich.
- DON’T OVERMIX THE BATTER: Once you fold in the eggs, stop after 10-12 strokes. Overmixing introduces too much air, which can cause the cake to sink or develop a tough crumb. The batter should look just combined, not whipped. I used to go overboard, and my cakes would either collapse or taste dry.
- BAKE UNTIL THE CENTER HITS 205°F: That toothpick test is unreliable for this dense cake. Use an instant-read thermometer instead—pull it out when the center reads 205°F. If you take it out too soon, the middle will stay gummy, and if you wait too long, it’ll dry out. Trust the thermometer, not your eyes.
Pro cooking tips for this recipe
Buttercream Mastery
For ultra-smooth buttercream, use the Swiss meringue method—heat 1 cup heavy cream and 1 cup granulated sugar in a saucepan over medium heat until it reaches 238°F on a candy thermometer.
Pour this hot mixture into a stand mixer bowl with 1 cup egg whites and whip until cool and glossy. Gradually add the 1.5 cups softened butter while mixing on low. This method creates a lighter, more stable frosting that won’t melt in warm rooms. 🌟
Fudgy Core Secret
The fudgy center comes from adding 0.25 cup warm milk to each pan before baking. This extra liquid creates a denser, brownie-like texture in the center while keeping the outer layers tender. For extra richness, replace half the milk with melted dark chocolate—just 0.125 cup per pan.
Always bake until the edges are set but the center still jiggles slightly—this ensures the perfect texture.
Layer Leveling
Use a serrated knife to level each cake layer after cooling. Place the cake on a cutting board, then gently press down with the knife to create a flat surface. This ensures even frosting distribution and a professional finish.
For extra stability, place a parchment circle on the cake stand before adding the first layer—it prevents the cake from sticking and makes stacking easier.
Temperature Control
Room-temperature ingredients are non-negotiable for this cake. Let your eggs, butter, and milk sit at room temperature for at least 1 hour before mixing. Cold ingredients can cause the batter to curdle or the buttercream to seize.
I keep my butter in the fridge until 30 minutes before baking, then place it in a warm spot to soften. This step makes all the difference in texture and flavor.
Cake Pans Matter
Use dark metal cake pans for even baking—they absorb and distribute heat better than glass or light-colored pans. Grease them thoroughly with butter or baking spray, then line the bottom with parchment circles to prevent sticking.
If you don’t have parchment, dust the pans with cocoa powder instead of flour—it adds flavor and prevents the cake from drying out. 💫
Chilling for Stability
Always chill the assembled cake in the fridge for 30 minutes before decorating. This helps the buttercream set and prevents the layers from sliding. For extra stability, especially in warm kitchens, freeze the cake for 10 minutes** before frosting the final layer.
This trick works wonders for maintaining clean edges and a polished look.
Nutrition facts
Frequently asked questions
Can I make this cake without eggs?
Yes! For a vegan version, replace the 6 eggs with 1.5 cups aquafaba (chickpea brine) whipped to stiff peaks, or use a flax egg substitute (6 tbsp ground flaxseed + 1.5 cups water). The texture will be slightly denser but still delicious. For the buttercream, use vegan butter and plant-based cream.
Why does my cake crack on top?
Cracking usually happens from sudden temperature changes. Let the cakes cool in their pans for 10 minutes before removing, and avoid opening the oven door too early. Also, make sure your oven isn't too hot—350°F is perfect. If cracks appear, they won't affect flavor but can be covered with extra frosting.
How do I make the frosting lighter?
For a lighter texture, try the Swiss meringue method—heat 1 cup cream + 1 cup sugar to 238°F, then whip with egg whites before adding butter. This creates a fluffier frosting that won't melt as easily. For extra stability, chill the cake for 30 minutes before decorating.
Can I bake this in a different pan size?
Yes, but adjust baking times. For 8-inch pans, bake 25-30 minutes; for 10-inch pans, bake 35-40 minutes. Use a toothpick test—it should come out with moist crumbs. The cake layers should be about 1.5 inches thick for proper structure.
What's the best way to store leftovers?
Store the frosted cake in an airtight container at room temperature for up to 2 days. For longer storage, refrigerate for 5 days or freeze the unfrosted layers for 3 months. Refrigerated cake is best served at room temperature—bring it out 1 hour before serving.