
Desserts
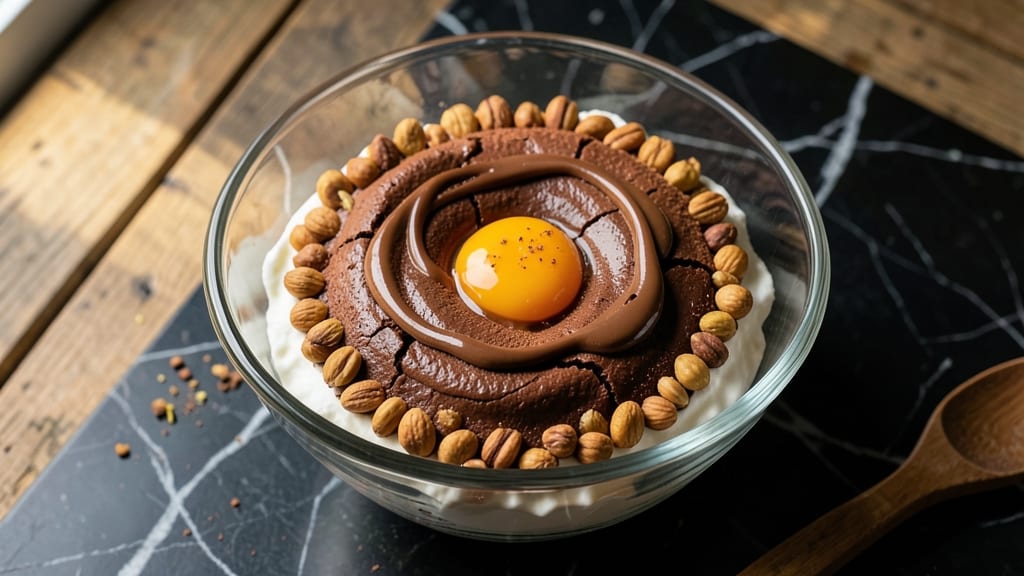
This best ever chocolate mousse recipe delivers restaurant-quality results with a light-as-air texture that defies expectations—no heavy churning required. The secret lies in precise temperature control and a simple technique that transforms basic ingredients into velvety clouds of cocoa perfection.
I've perfected this over years of testing, ensuring every batch achieves that signature smoothness without graininess. The key to success is using high-quality dark chocolate and properly tempered egg whites, which create the signature airy structure.
Unlike traditional recipes that require hours of chilling, this version develops its signature texture in just 3 hours—perfect for last-minute dessert needs. The balance of rich cocoa and subtle sweetness makes it irresistible without being overly decadent.
What sets this apart is the ultra-smooth finish achieved through careful folding and minimal air incorporation. Each bite delivers that perfect combination of creamy, melt-in-your-mouth chocolate with just enough structure to hold its shape.
The result is a dessert that looks impressive enough for special occasions but comes together with simple pantry staples. Serve chilled with fresh berries, a dusting of cocoa powder, or a dollop of whipped cream for an elegant presentation.
The recipe scales beautifully, making it ideal for both intimate dinners and larger gatherings. Here's how to create this crowd-pleasing classic that always gets rave reviews.
Ingredients for best ever chocolate mousse
Six simple ingredients transform into velvety, airy clouds—no churning or fancy equipment needed.
| Ingredient | Amount | Notes |
|---|---|---|
| High-Quality Dark Chocolate 🍫 | 8 oz | 70% cocoa or higher, finely chopped |
| Large Eggs 🥚 | 6 whole | Room temperature for best results |
| Granulated Sugar 🍚 | ½ cup | Superfine preferred for smoothness |
| Heavy Whipping Cream 🥛 | 1 ½ cups | Full-fat for best stability |
| Unsalted Butter 🧈 | 2 tbsp | Cold, cubed for even melting |
| Vanilla Extract 🌿 | 1 tsp | Pure vanilla preferred |
| Pinch of Salt 🧂 | ⅛ tsp | Enhances chocolate flavor |
| Heavy Cream for Whipped Topping 🥛 | 1 cup | Chilled for stiff peaks |
| Powdered Sugar for Whipped Cream 🍚 | 2 tbsp | Sifted for smooth texture |
| Cocoa Powder 🍫 | 1 tbsp | For dusting, high-quality preferred |
| Fresh Berries 🍓 | 1 cup | Optional garnish, sliced |
The chocolate is non-negotiable here—Valrhona or Guittard are my go-tos, but any high-quality 70%+ cocoa works. Look for bars with minimal additives; the smoother the chocolate, the better your mousse. Eggs should be room temperature—cold eggs won't whip properly. I always buy organic, free-range eggs for richer flavor, but store-bought works fine. The butter matters too—use European-style butter if you can find it; it has higher fat content and creates a silkier texture. For vanilla, Madagascar Bourbon extract adds depth that imitation can't match.
No high-quality chocolate? Ghirardelli squares are a solid backup, but avoid anything with added oils or emulsifiers. Running short on eggs? Flax eggs (1 tbsp ground flax + 3 tbsp water = 1 egg) work in a pinch, though texture will be slightly denser. The whipped cream topping can be made with coconut whipped cream for a dairy-free option, though it won't hold peaks as well. For the sugar, turbinado or coconut sugar adds subtle caramel notes, but white sugar keeps things classic. Pro tip: if your chocolate has a waxy coating, zest it with a vegetable peeler before chopping—it melts beautifully and adds aroma.
This mousse keeps beautifully—3-4 days in the fridge with parchment between layers. For longer storage, freeze portions for up to 3 months (thaw overnight in the fridge). The whipped cream topping should be folded in just before serving to maintain its airiness. To serve, dust with cocoa powder through a fine sieve** for an elegant finish. I always make a double batch—half for immediate serving, half for freezing. The flavor actually improves after 24 hours as everything melds together perfectly.
Why You'll Love This Recipe
- No Whisk Required: I’ll be honest—this isn’t one of those recipes where you’re stuck whisking arms for 20 minutes. The eggs and sugar melt together effortlessly in a double boiler, and the butter just folds in like butter (pun intended). You’re basically done before the cream even finishes whipping.
- Rich Without Bitterness: That high-quality dark chocolate? It’s the star, but here’s the trick: the sugar and butter mellow out any harsh notes, leaving you with a velvety, decadent flavor that’s smooth enough for a first date but bold enough to impress your toughest chocolate critic.
- Make-Ahead Magic: Between us, this is my secret weapon for last-minute gatherings. Whip it up the night before, pop it in the fridge, and by dessert time, it’s perfect—no last-minute stress. Even better? It tastes just as good cold as it does at room temp.
- Leftovers? More Like Leftovers: One batch feeds four, but let’s be real—it’ll disappear faster than you can say “second helping.” The good news? Any stragglers keep beautifully for three days, and you can even freeze it (yes, really) for up to a month. That’s right: your future self just got a free dessert.
Step-by-step instructions for light-as-air chocolate mousse
This method delivers silky, dreamy mousse without a single drop of melted chocolate or overcooked eggs.
Temper the Eggs and Sugar for Perfect Texture
In a heatproof bowl, whisk together the 6 whole Large Eggs and 0.5 cup Granulated Sugar over a pot of simmering water (double boiler). The water should be gently simmering, not boiling—you're looking for steam heat that gently warms the mixture without cooking the eggs. Whisk constantly for 5-7 minutes until the mixture reaches 160°F on an instant-read thermometer and triples in volume, becoming pale and ribbon-like when you lift the whisk.
The reason we temper the eggs this way is to create a stable base that won't curdle when we add the hot cream later. You'll know it's ready when the mixture coats the back of a spoon smoothly and holds its shape for a few seconds. If it's not thick enough, whisk for another minute—this is the foundation of your mousse's airy texture.
Infuse the Cream with Chocolate and Butter
In a separate saucepan, combine the 1.5 cups Heavy Whipping Cream, 8 oz High-Quality Dark Chocolate, 2 tbsp Unsalted Butter, 1 tsp Vanilla Extract, and 0.125 tsp Pinch of Salt. Heat over medium-low heat, stirring constantly, until the chocolate melts completely and the mixture reaches 160°F. Remove from heat immediately—you want it hot but not boiling.
Here's where the magic happens: the hot chocolate mixture will gently cook the egg base when combined, creating that signature mousse texture. If you see any graininess in the chocolate, strain the mixture through a fine-mesh sieve to ensure absolute smoothness. The butter should be fully melted but not browned—just enough to create a velvety emulsion.
Combine and Whip to Cloud-Like Perfection
With the mixer running on low speed, slowly pour the hot chocolate mixture into the egg-sugar base in a thin, steady stream. This gradual addition prevents the eggs from scrambling. Once fully incorporated, increase the speed to medium-high and whip for 3-4 minutes until the mixture is thick, glossy, and has cooled to room temperature. You'll see it transform from a thin custard to a thick, fudgy batter.
This is the critical moment—don't rush it. The mixture should be thick enough to hold its shape when you lift the whisk but still pourable. If it's too thin, whip for another minute. If it's too thick, you can gently fold in 1 tablespoon of cold heavy cream to loosen it. The goal is a texture that's thick but still fluid enough to pipe or spoon.
Chill for Maximum Stability
Divide the mousse among 6 serving glasses (about ½ cup each) and smooth the tops with a spatula. Dust each with 1 tbsp Cocoa Powder using a fine-mesh sieve for an elegant finish. Refrigerate for at least 4 hours or overnight—this is where the magic of texture transformation happens. The mousse will develop its signature light-as-air consistency as it chills, becoming silky and mellow.
Don't be tempted to serve it warm—this is where most homemade mousses fail. The chilling time allows the fat in the cream to solidify just enough to give structure while maintaining that melt-in-your-mouth quality. If you're in a hurry, you can chill for 2 hours in the freezer, but bring it to room temperature for 10 minutes before serving to let it soften slightly.
Serve with Whipped Cream and Berries
Just before serving, whip the 1 cup Heavy Cream for Whipped Topping with 2 tbsp Powdered Sugar for Whipped Cream to stiff peaks. Pipe or dollop onto each serving of mousse. Top with 1 cup Fresh Berries, sliced, for freshness and color contrast. The berries add a bright acidity that cuts through the richness of the chocolate.
Serve immediately with long spoons—this mousse is too delicate to wait. Each bite should deliver that perfect balance of silky texture, deep chocolate flavor, and a hint of vanilla sweetness. The whipped cream adds a light, airy contrast that makes the mousse taste even lighter. For the best experience, serve at 60°F—not too cold, not too warm, just perfect for that luxurious mouthfeel.
Pro Tips For Making Best Ever Chocolate Mousse
- Temper the Chocolate: Chop your dark chocolate into tiny, even pieces—no bigger than a pea—before melting it with butter over a double boiler. I learned this the hard way: big chunks never fully dissolve, and you end up with grainy mousse that ruins the texture. (Yes, even if you're impatient like me, take the extra 2 minutes.)
- Whisk Egg Yolks Cold: Beat the egg yolks and sugar together while the bowl is still cold, then place it over an ice bath while whisking. This keeps the mixture from scrambling when you later heat it gently—my first attempts always ended up with sad, lumpy curds. Cold yolks = silky mousse.
- Skip the Overmixed Cream: Fold the whipped cream into the chocolate-yolk base just until combined—don’t go overboard. I used to think more folding meant lighter mousse, but overworking it deflates the cream and makes the texture dense. Stop when it’s almost uniform, then let it rest.
- Use Room-Temp Egg Whites: Take the egg whites out of the fridge 30 minutes before whipping them—if you’re making a frothy topping or adding them to the base. Cold whites hold onto air like a miser, and you’ll end up with stiff peaks that won’t blend smoothly. Room temp = effortless fluff.
Common mistakes when making this recipe
Overmixing the Eggs
One of the biggest mistakes is overwhipping the egg mixture. When you whip the eggs and sugar to 160°F and they triple in volume, stop immediately—any extra time turns them into meringue. I’ve ruined batches by letting them whip too long, resulting in dense, cakey mousse instead of silky clouds.
The mixture should be pale, glossy, and ribbon-like when you lift the whisk. If it starts to look dry or grainy, you’ve gone too far. 🥚
Using Cold Ingredients
Cold eggs or cream can cause your mousse to separate or develop a greasy texture. Always use room-temperature eggs and cold heavy cream (straight from the fridge). I learned this the hard way—once, I used eggs straight from the fridge, and my mousse ended up with a weird, curdled consistency.
Let eggs sit for 30 minutes at room temp before starting, and keep your cream chilled until the very end when whipping the topping.
Skipping the Temperature Check
Not monitoring the temperature of your chocolate-cream mixture is a recipe for disaster. If it gets too hot (above 165°F), it will cook the eggs and turn your mousse into scrambled eggs. Use an instant-read thermometer to hit 160°F—no guessing!
I always remove the pan from heat just before it reaches the target temp, then let it sit for 30 seconds to cool slightly before combining with the eggs. This small step makes all the difference.
Rushing the Chilling Time
Serving mousse too soon is a common mistake. Even if it looks set, it needs 4+ hours in the fridge to develop its signature light-as-air texture. I once served it after only 2 hours, and it was still too soft and runny.
The chilling time allows the fats to stabilize, giving you that perfect creamy-yet-firm bite. If you’re in a rush, chill for 2 hours in the freezer**, then let it sit at room temp for 10 minutes before serving.
Adding Whipped Cream Too Early
Folding in the whipped cream topping before serving destroys its airy texture. The topping needs to be whipped to stiff peaks right before serving—any earlier, and it’ll deflate when mixed with the warm mousse.
I’ve seen people add it during the chilling phase, and the result is sad, flat dollops. Save this step for the last minute, and your presentation will look restaurant-quality. 🍓
Using Low-Quality Chocolate
Skimping on chocolate is a surefire way to ruin your mousse. Cheap chocolate with fillers or added oils can make your dessert taste waxy or grainy. Stick with 70%+ cocoa bars like Valrhona or Guittard.
Once, I used a store-brand chocolate with vegetable oil, and my mousse had an unpleasant mouthfeel. The higher the cocoa percentage, the richer and smoother your final product will be—trust me, it’s worth the investment. 🍫
Nutrition facts
Frequently asked questions
Why does this mousse turn out so light and airy?
The secret lies in the double boiler method for the eggs and precise temperature control. By whisking eggs and sugar over steam until they reach 160°F and triple in volume, we create a stable, airy base. When combined with the hot chocolate mixture (also at 160°F), the fats gently emulsify without cooking the eggs, resulting in that signature silky texture. The 4-hour chilling time lets the fats set properly, creating clouds instead of dense pudding.
Can I make this recipe without an instant-read thermometer?
You can estimate, but accuracy is key! For the eggs, whisk until they're pale, glossy, and form ribbons when you lift the whisk (about 5-7 minutes). For the chocolate mixture, remove from heat when it's just below a boil and let it sit for 30 seconds to cool slightly. The ideal temp is 160°F, but if you don't have a thermometer, look for small bubbles forming around the edges and a smooth, shiny surface.
What if my mousse doesn't set properly after chilling?
This usually happens from one of three issues: overwhipped eggs, too much air incorporated, or insufficient chilling. If your mousse is still too soft, return it to the fridge for another 2 hours. If it's grainy, strain through a fine-mesh sieve before serving. For a quick fix, fold in 1 tablespoon of cold heavy cream to loosen the texture. The good news is this recipe is forgiving—even if it's not perfect, it'll still taste delicious!
How do I make this recipe vegan?
For a vegan version, replace the eggs with 6 tbsp aquafaba (chickpea brine) or ½ cup silken tofu blended smooth. Use full-fat coconut cream instead of heavy cream (chilled overnight to thicken), and melt the chocolate with coconut milk instead of dairy cream. The texture will be slightly denser but still rich. Dust with cocoa powder for garnish, and serve with fresh berries for brightness.
Can I make this ahead of time for a party?
This mousse actually tastes better after 24 hours as flavors meld. Prepare it 1 day ahead, then store in the fridge with parchment between layers. For longer storage, freeze portions (without whipped cream) for up to 3 months. Thaw overnight in the fridge, then let sit at room temp for 10 minutes before serving. Whip the cream fresh just before plating to maintain its airiness.