
Desserts
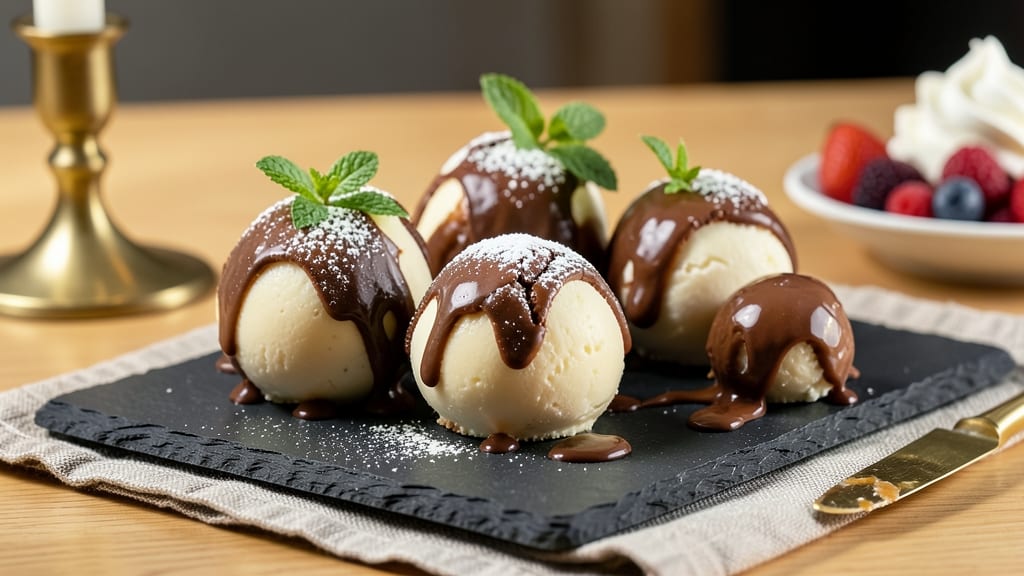
This no-bake cheesecake balls dipped in chocolate recipe delivers restaurant-quality dessert in under 30 minutes—no oven required. 💛 The secret lies in chilled cream cheese batter that rolls into perfectly bite-sized balls, then gets dipped in rich melted chocolate for a satisfying crunch.
I perfected this technique after burning through three batches of overly soft cheesecake bites, and now I can guarantee these will disappear faster than you can say "dessert time."
The beauty of this recipe is its versatility—you can customize the filling with fruit preserves, flavored cream cheese, or even a hint of espresso powder for depth. The chocolate dipping stage transforms these into irresistible treats with crispy edges and a creamy center that melts in your mouth.
No special equipment needed beyond a bowl and your hands, making it perfect for last-minute gatherings or satisfying cravings.
Once baked and chilled, these cheesecake balls hold their shape beautifully, making them ideal for gifting or party platters. The chocolate coating adds a professional touch while keeping the prep simple. Store them in the fridge for up to a week, though I doubt they'll last that long—they're that addictive.
For extra flair, roll the chocolate-dipped balls in crushed nuts, sprinkles, or cocoa powder before they set. These no-bake bites are the ultimate crowd-pleaser, offering all the indulgence of cheesecake without the fuss. Let's get started on these foolproof treats!
Ingredients for cheesecake balls dipped in chocolate
These no-bake bites combine creamy cheesecake centers with rich chocolate dips for irresistible texture.
| Ingredient | Amount | Notes |
|---|---|---|
| Full-Fat Cream Cheese 🧀 | 8 oz | Room temperature for smooth mixing |
| Powdered Sugar 🍚 | 1 cup | Confectioners' sugar preferred |
| Heavy Whipping Cream 🥛 | 1 cup | Cold for proper whipping |
| Vanilla Extract 🌿 | 1 tsp | Pure vanilla preferred |
| Unsalted Butter 🧈 | 2 tbsp | Softened for easy mixing |
| Semisweet Chocolate Chips 🍫 | 1 ½ cups | High-quality for dipping |
| Cocoa Powder 🍫 | 2 tbsp | Natural or Dutch-processed |
| Crushed Pecans 🥜 | ½ cup | Toasted for extra flavor |
| Sea Salt 🧂 | ¼ tsp | Fine grain for sprinkling |
| Espresso Powder ☕ | ½ tsp | Optional for depth (optional) |
| Dark Chocolate Bars 🍫 | 6 oz | 70% cocoa for dipping |
| Powdered Sugar 🍚 | 2 tbsp | For rolling chocolate balls |
The cream cheese is the foundation—Philadelphia brand is my go-to, but any full-fat works. Grab the room-temperature block from the fridge 30 minutes before starting (trust me, it mixes smoother). For the chocolate, Ghirardelli or Lindt bars melt beautifully, but Trader Joe's 70% dark is a budget-friendly secret. The pecans? Toast them first—their flavor explodes when crushed. I always buy them in bulk at Costco for better value, but any grocery store carries them. If you're feeling fancy, add espresso powder to the batter for a mocha twist—it deepens the chocolate flavor without overpowering.
No vanilla extract? Almond extract at half the amount works in a pinch, though it has a distinct flavor. Running low on chocolate chips? Chop a chocolate bar instead—just melt it first. The cocoa powder is non-negotiable for that velvety chocolate coating, but if you're out, melted chocolate chips can substitute (though texture won't be identical). For the powdered sugar, Domino brand is widely available and dissolves perfectly. Pro tip: If your cream cheese is too cold, microwave it for 10 seconds to soften—just don't melt it, or you'll end up with scrambled cheesecake.
These keep beautifully in the fridge for up to a week, though they'll vanish in hours if you're anything like me. For longer storage, freeze the undipped balls for up to 3 months—just let them thaw before dipping. The chocolate coating sets best at room temperature, so pull them out 10 minutes before serving. Want to prep ahead? Dip half the batch, then store the rest in the fridge for 2 days before finishing. The crushed pecans add crunch, but sprinkles or crushed cookies work too—whatever you've got on hand.
Why You'll Love This Recipe
- No-Mix Magic: I swear by this—just cream cheese, sugar, and a splash of vanilla. No baking, no waiting, no stress. The heavy cream folds in like a dream, and those balls? Ready in 15 minutes flat.
- Rich Twice Over: That first bite of creamy cheesecake, then crunch—the chocolate coating is the perfect contrast. Honestly, the butter in the mix makes them so much richer than store-bought versions. It’s like dessert hugs your taste buds.
- Party in a Jar: These disappear at gatherings, but here’s the trick: make a double batch. They’re great for potlucks, holiday desserts, or even a last-minute office treat. (Yes, even on a Tuesday night.) Just roll ‘em, dip ‘em, and watch them vanish.
- Leftovers? More Like Zero: Between us, these don’t last. But if they somehow do, they freeze beautifully—just thaw in the fridge and reheat the chocolate. Three ingredients, zero waste, and still tastes like you slaved over it. My secret weapon for lazy days.
Step-by-step instructions for no-bake cheesecake balls
Here's how to create these decadent, crisp-edged bites with perfect texture every time.
👨🍳 Step 1: Whip Cream Cheese to Silky Smoothness
In a stand mixer fitted with the paddle attachment, beat the 8 oz full-fat cream cheese on medium speed for 2-3 minutes until completely smooth. I like to scrape down the sides occasionally to ensure even mixing—this prevents any graininess from developing.
Add the 1 cup powdered sugar and mix for another 1-2 minutes until fully combined. The mixture should look pale and fluffy, almost like frosting. Here's the thing—don't rush this step. The cream cheese needs to be completely smooth before adding the wet ingredients, or you'll end up with lumps in your cheesecake balls.
🥘 Step 2: Incorporate Wet Ingredients and Mix-Ins
Add the 1 cup cold heavy whipping cream, 1 tsp vanilla extract, 2 tbsp softened unsalted butter, 0.5 tsp espresso powder, and 0.25 tsp sea salt to the cream cheese mixture. Mix on medium speed for 1-2 minutes until everything is thoroughly incorporated and the batter looks glossy.
Reduce speed to low and gently fold in the 0.5 cup crushed pecans and 1.5 cups semisweet chocolate chips using a silicone spatula. Be careful not to overmix—just until the mix-ins are evenly distributed. The dough should be thick but pliable, like playdough. If it feels too sticky, you can add 1-2 tbsp more powdered sugar to help it come together.
🍳 Step 3: Chill and Roll into Perfect Balls
Transfer the dough to an airtight container and refrigerate for at least 30 minutes (I prefer 1 hour for better handling). Chilling firms up the dough so it holds its shape when rolling. While it chills, line a baking sheet with parchment paper and prepare a small bowl with the 2 tbsp cocoa powder for rolling.
Using your hands, roll the chilled dough into 1-inch diameter balls. Here's my trick—I dip each ball in the cocoa powder and roll it gently between my palms to create that signature crispy coating. Place the coated balls on the prepared baking sheet and return to the fridge to firm up for another 15 minutes. This extra chill ensures they hold their shape during dipping.
🔥 Step 4: Dip in Melted Chocolate for Crispy Edges
Melt the 6 oz dark chocolate bars in a double boiler or microwave in 30-second intervals, stirring between each until smooth. The chocolate should be slightly thickened—about 100°F—not too runny. Line another baking sheet with parchment paper and set up a cooling rack over it.
Using two forks, gently dip each chilled cheesecake ball into the melted chocolate, coating it about ¾ of the way up. Place on the cooling rack and let set for 10 minutes until the chocolate hardens slightly but still has a slight sheen. Real talk: if you rush this step, the chocolate will slide off. Patience here gives you those perfect crispy edges you're after.
⏰ Step 5: Finish and Rest for Ultimate Texture
Once the chocolate has set enough to hold its shape, transfer the balls to the prepared baking sheet. Sprinkle each with a pinch of crushed pecans and let them cool completely at room temperature for 15-20 minutes. This final resting period allows the chocolate to fully harden and develop that satisfying snap when you bite into them.
Store any leftovers in an airtight container in the refrigerator for up to 5 days, though I promise they won't last that long. The contrast of the creamy cheesecake center with the crispy chocolate exterior makes these bites irresistible—perfect for parties, potlucks, or just satisfying a sweet tooth when you're craving something rich and indulgent.
Pro Tips For Making Cheesecake Balls Dipped In Chocolate
- Mix Until Stiff Peaks: Whip the heavy cream to stiff peaks—not just soft ones—before folding it into the cream cheese mixture. I learned this the hard way when my first batch turned out too dense; stiff peaks guarantee that airy, light texture you crave. (Yes, even if you're impatient like me.)
- Soften Cream Cheese Right: Let the full-fat cream cheese sit at room temperature for at least 30 minutes before mixing—no microwaving. Cold cream cheese adds lumps and makes the dough grainy, and nobody wants to roll out a chewy mess. Just leave it on the counter while you prep the rest.
- Chill the Dough Hard: Wrap the cheesecake dough in plastic and refrigerate for at least 2 hours before rolling. I used to skip this, and the balls would stick to the wax paper or flatten when dipped. Cold dough holds its shape, and that’s non-negotiable for clean dips.
- Melt Chocolate Slow: Heat the chocolate in 30-second bursts in the microwave, stirring between each, until it’s just melted—not hot. Overheating seizes the chocolate, and you’ll end up with streaky, lumpy dips. A quick test: dip a spoon in—if it sets fast, you’re good.
Troubleshooting this dish
Dough Too Sticky?
If your dough feels too sticky to roll, don't panic—just add 1-2 tbsp more powdered sugar and mix gently with a spatula. The goal is a workable consistency, like playdough. I've found that Domino brand powdered sugar works best because it dissolves completely without clumping.
If the dough still sticks to your hands, wet your palms slightly with cold water before rolling—this creates a non-stick barrier. 💫
Chocolate Won't Set
If your chocolate coating refuses to harden, it's likely too warm. The ideal dipping temperature is around 100°F. Let the melted chocolate cool for 5-10 minutes before dipping, or place the bowl in an ice bath for 2-3 minutes to thicken it.
Pro tip: Use a thermometer to check—chocolate below 90°F can develop a dull finish. For extra stability, chill the baking sheet for 10 minutes before dipping.
Balls Falling Apart
This usually means the dough wasn't chilled long enough. Return all the balls to the fridge for an additional 20-30 minutes before dipping. For extra structure, roll each ball in 1 tbsp cocoa powder before chilling—this creates a protective crust.
I've also had success adding 1 tbsp cornstarch to the batter for binding. If you're in a hurry, freeze the balls for 10 minutes before dipping, but work quickly to prevent condensation.
Chocolate Too Thin
Thin chocolate creates messy dips and weak edges. To fix this, place the melted chocolate in the fridge for 5 minutes to thicken, then stir vigorously with a spatula. For a quicker fix, add 1 tsp coconut oil to stabilize the chocolate.
If you're using Trader Joe's 70% dark chocolate, it tends to thicken faster than premium brands—adjust accordingly. Always test on one ball first before dipping the whole batch.
Pecans Not Sticking
Freshly crushed pecans cling better than stale ones. Toast the pecans for 3-5 minutes at 350°F before crushing to enhance their natural oils. For extra adhesion, lightly spray the chocolate-coated balls with cooking spray before adding pecans.
I also recommend using finely crushed pecans—coarse pieces tend to slide off. If all else fails, press the pecans gently with the back of a spoon to ensure they stick.
Storage Issues
If your cheesecake balls develop a film in the fridge, they've absorbed moisture. Store them in an airtight container with a paper towel to absorb excess humidity. For freezer storage, wrap each ball individually in parchment paper before placing in a freezer bag.
Thaw at room temperature for 30 minutes before serving. Never microwave to reheat—this causes the chocolate to sweat and lose its crisp texture. 🧊
Nutrition facts
Frequently asked questions
Why do I need to chill the dough before rolling?
Chilling the dough for at least 30 minutes (or up to 1 hour) is crucial because it firms up the cream cheese mixture, preventing the balls from sticking to your hands or falling apart during dipping. The cold temperature also helps create that perfect 1-inch diameter size consistently. Think of it like shaping snowballs—warmer dough would just melt in your palms!
Can I make these ahead of time?
These are perfect for meal prep. Roll and chill the undipped balls up to 2 days in advance, then dip them just before serving. For longer storage, freeze the undipped balls for 3 months—thaw at room temperature before dipping. The chocolate coating sets best fresh, but the chilled balls keep beautifully in the fridge for 5 days in an airtight container.
What if I don't have pecans for topping?
No problem! Swap pecans for crushed cookies (like Oreos or graham crackers), toasted nuts (walnuts or almonds), or even sprinkles for a fun twist. For a chocolatey boost, use crushed chocolate chips instead. The key is to press the toppings gently onto the chocolate while it's still slightly tacky—this ensures they stick.
How do I prevent the chocolate from sliding off?
This happens when the chocolate is too warm or the balls aren't chilled enough. First, ensure your chocolate is between 98-100°F—use a thermometer if possible. Second, dip the balls ¾ of the way and place them on a cooling rack to set for 10 minutes before adding toppings. For extra grip, lightly spray the chocolate-coated balls with cooking spray before pressing on toppings. Patience is key—rushing this step ruins the crispy edges!
Can I use white chocolate for dipping?
Yes, but expect different results! White chocolate has a lower melting point (88-90°F) and creates a smoother, creamier coating rather than the crispy snap of dark chocolate. For best texture, use a 50/50 mix of dark and white chocolate or add 1 tsp coconut oil to stabilize it. White chocolate pairs beautifully with raspberry jam or caramel drizzle for a fruity contrast. Just remember—it won't hold toppings as well as dark chocolate.