
Desserts
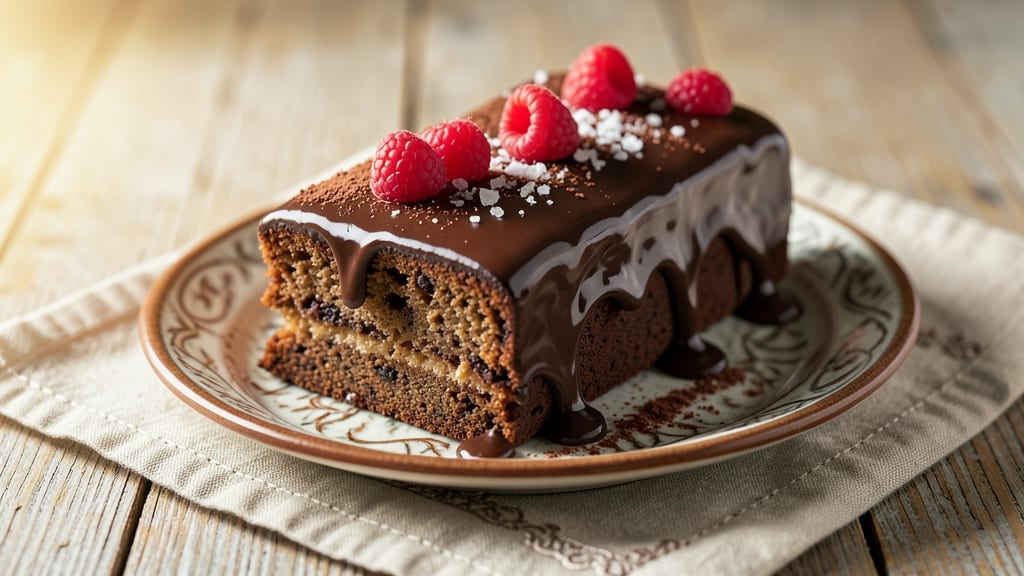
This Bûche de Noël chocolate sponge recipe transforms a simple dessert into a showstopping centerpiece for the holidays. 🌟 The secret lies in a perfectly moist, coffee-infused sponge layered with velvety ganache that mimics a real yule log's texture and aroma.
I've perfected this technique after years of holiday baking, ensuring every slice delivers rich chocolate flavor with just the right balance of bitterness and sweetness.
The recipe begins with a light, airy sponge cake baked in a rectangular pan, then rolled and filled with coffee-infused ganache that stays perfectly firm at room temperature. This isn't your average chocolate cake—it's a masterpiece that requires patience during the assembly process, but the results are worth every minute.
The coffee infusion adds depth that elevates ordinary chocolate into something truly special.
By the time you're done, you'll have a restaurant-quality dessert that looks like it came from a patisserie, complete with chocolate shavings and dusted cocoa powder for that authentic French touch.
The sponge remains tender while the ganache stays rich and glossy, creating the perfect balance of textures in every bite. This is the kind of dessert that makes your holiday table feel truly festive.
Perfect for Christmas celebrations or any special occasion, this Bûche de Noël can be made ahead and stored for up to three days, making it ideal for busy hosts.
Serve with a dollop of whipped cream or a scoop of vanilla ice cream for the ultimate indulgence. Let's create this holiday masterpiece together.
Ingredients for buche de noel chocolate sponge
These 13 ingredients create a showstopping yule log with perfect layers and rich coffee-chocolate flavor. 🎄
| Ingredient | Amount | Notes |
|---|---|---|
| All-Purpose Flour 🌾 | 2 cups | Sifted for light texture |
| Unsalted Butter 🧈 | 1 ½ cups | Room temperature, full-fat |
| Granulated Sugar 🍚 | 1 ½ cups | Superfine preferred for smoothness |
| Large Eggs 🥚 | 4 whole | Room temperature, separated |
| Instant Espresso Powder ☕ | 1 tbsp | High-quality for deep flavor |
| Baking Powder 🧂 | 1 tsp | Double-acting for lift |
| Salt 🧂 | ½ tsp | Fine sea salt preferred |
| Vanilla Extract 🌿 | 1 tbsp | Pure Madagascar for aroma |
| Dark Chocolate Chips 🍫 | 12 oz | 70% cocoa, chopped fine |
| Heavy Whipping Cream 🥛 | 3 cups | Cold, full-fat for ganache |
| Powdered Sugar 🍚 | 1 cup | For dusting and whipping |
| Unsweetened Cocoa Powder 🍫 | ½ cup | Natural for dusting |
| Meringue Powder 🍬 | 1 tbsp | Optional for extra stability |
The espresso powder is non-negotiable for that authentic coffee depth—Starbucks or Lavazza are my go-tos, but any high-quality instant works. Dark chocolate chips should be at least 70% cocoa for that bittersweet balance (the good stuff, not the grocery store basics). For the butter, Plugrá or Land O'Lakes unsalted are perfect—room temperature is key, so take it out 30 minutes before baking. The flour? King Arthur or Gold Medal brands work best for that tender crumb. Pro tip: Sift everything together to avoid lumps in your sponge.
No instant espresso? Brewed coffee cooled to room temp works in a pinch (use 1 cup instead), but the powder gives you that concentrated punch. Running short on dark chocolate? Chop a 70% bar yourself—it melts better than chips. The meringue powder is optional but helps stabilize the ganache if you're worried about it melting too fast. For the vanilla, Madagascar Bourbon extract adds depth, but imitation will work if that's what you've got. The cocoa powder should be natural (not Dutch-processed) for that true chocolatey flavor when dusting.
This sponge keeps beautifully—wrap tightly in plastic and store at room temp for 2 days. The ganache? It stays firm for 3 days if refrigerated, but bring it to room temp before assembling. I always make mine a day ahead so the flavors meld perfectly. For presentation, use a rectangular cake pan (8x12 inches) for the sponge, then roll it like a Swiss roll. Dust with cocoa powder right before serving—use a fine-mesh sieve for that professional patisserie look. Leftovers? Reheat the ganache gently and reassemble.
Why You'll Love This Recipe
- I’ll be real: I always bake a second one because the sponge keeps beautifully for days. Slice it thin, toast it lightly, and layer with Nutella or fresh berries—suddenly, you’ve got a no-fuss dessert that feels special. And since it uses pantry basics, it’s the kind of recipe that doesn’t break the bank.
- No Mixer Needed: I swear by this recipe when my stand mixer’s on vacation—just fold the butter into the sugar by hand until it’s light and fluffy. The eggs come in next, and honestly? The espresso powder gives it that deep, sophisticated chocolate kick without extra fuss.
- Espresso Edge: That tiny pinch of instant espresso powder isn’t just for show—it cuts through the richness and makes every bite taste like a fancy patisserie’s secret. The butter stays creamy, the sugar caramelizes just enough, and the flour keeps it light. It’s the kind of chocolate you’ll reach for when you’re craving something indulgent but still feels balanced.
- Holiday or Anytime: Between us, I make this year-round—wrapped in cling film for a last-minute gift, sliced for breakfast with whipped cream, or even as a dessert for a weeknight date night. The sponge’s sturdy enough to hold its shape but still melts in your mouth, so it’s never just a holiday treat.
Step-by-step instructions for buche de noel chocolate sponge
Here's how to create a showstopping Yule log with perfect layers and rich coffee ganache.
👨🍳 Step 1: Whip Butter and Sugar to Fluffy Perfection
In a stand mixer fitted with the paddle attachment, beat the 1.5 cups unsalted butter and 1.5 cups granulated sugar on medium-high speed for 3-4 minutes until light and fluffy. You'll see the mixture nearly double in volume and turn pale yellow—this incorporates air that creates the light texture we want. Here's the thing—don't rush this step. The butter needs time to become completely smooth and creamy.
Once it's fully combined, reduce speed to low and add the 4 whole large eggs, one at a time, mixing just until each is fully incorporated. After the last egg, add the 1 tbsp vanilla extract and 1 tbsp instant espresso powder. Mix for another 30 seconds to combine. I like to press my finger into the mixture—it should leave a slight indent but hold its shape. This is your perfect base for the sponge.
👨🍳 Step 2: Combine Dry Ingredients for Lightness
In a separate bowl, whisk together the 2 cups all-purpose flour, 1 tsp baking powder, 0.5 tsp salt, and 0.5 cup unsweetened cocoa powder. Sift the flour mixture directly into the butter mixture while mixing on low speed. This prevents gluten development that would make your sponge dense. Mix just until combined—you should still see some flour streaks.
Now here's where it gets fun—fold in the 12 oz dark chocolate chips by hand using a silicone spatula. Make sure they're evenly distributed throughout the batter. The chocolate will melt slightly from the warm butter, creating pockets of molten chocolate in every bite. For even distribution, I like to press the chocolate chips into the batter rather than just stirring them in.
🔥 Step 3: Bake the Sponge to Golden Perfection
Preheat your oven to 350°F and line a 15x10-inch jelly roll pan with parchment paper. Spread the batter evenly into the pan—it should be about ¼-inch thick. Bake for 12-15 minutes until the edges are golden brown and a toothpick inserted in the center comes out clean. The top should look dry to the touch—this is crucial for rolling later.
As soon as it's done, invert the pan onto a clean kitchen towel dusted with 1 cup powdered sugar. This creates a smooth surface for rolling and prevents sticking. Let it cool completely before attempting to roll—patience here prevents cracks. I usually let it cool for about 10 minutes before carefully peeling back the parchment and rolling it up with the towel inside, starting from the long side.
🍳 Step 4: Prepare the Coffee-Infused Ganache
While the sponge cools, heat 3 cups heavy whipping cream in a saucepan over medium heat until it just begins to simmer. Pour the hot cream over the 12 oz dark chocolate chips in a heatproof bowl. Let it sit for 5 minutes, then stir until completely smooth. For extra depth of flavor, add 1 tbsp instant espresso powder and mix well.
Let the ganache cool to room temperature—about 30 minutes. It should thicken slightly but still be pourable. If it sets too quickly, microwave it in 10-second bursts until smooth again. Here's the trick: the ganache should be thick enough to hold its shape when spread but still flow easily. This creates that perfect glossy layer between the sponge and meringue.
🥘 Step 5: Assemble and Decorate Your Yule Log
Unroll the cooled sponge and spread the ganache evenly over the surface, leaving about ½-inch border uncovered. Roll it back up tightly using the towel to help with the shape. Chill in the refrigerator for at least 2 hours to set completely.
Once set, unroll the log and spread a thin layer of heavy whipping cream mixed with 1 tbsp meringue powder and 1 cup powdered sugar over the entire surface. Roll it back up gently, then cover with additional whipped cream. Dust generously with powdered sugar and unsweetened cocoa powder for that classic Yule log look. Slice just before serving to reveal the beautiful layers inside!
Pro Tips For Making Buche De Noel Chocolate Sponge
- Weigh the eggs cold: I used to pull eggs straight from the fridge and mix them in—big mistake. Chill them first for 10 minutes, then weigh them. The cold eggs emulsify better with butter and sugar, giving you a smoother batter that holds its shape when rolled. (Yes, even if you're impatient like me.)
- Whip butter and sugar properly: This isn’t just about creaming—beat the butter and sugar until it’s pale yellow and ribbony. I learned this the hard way after a batch collapsed like a sad soufflé. Use a stand mixer, scrape the bowl every 30 seconds, and don’t rush. The air in that butter-sugar mix is what makes the sponge light.
- Fold flour in gently: Dumping flour all at once is how you get a dense, brick-like buche. Sift it first, then add it in thirds, folding with a spatula just until combined. Overmixing = tough sponge. Stop when the batter is just mixed—no streaks, but no extra work either.
- Rest the rolled sponge: Skip this, and your buche will unravel like a poorly wrapped gift. Roll the sponge tightly, wrap it in plastic, and let it chill for at least 2 hours—overnight is better. The cold sets the shape, so it stays intact when you slice it. (Your future self will thank you.)
Essential equipment for buche de noel chocolate sponge
Must-Have Mixing Tools
Your stand mixer is non-negotiable for this recipe—I use my KitchenAid Artisan Series with the paddle attachment for whipping butter and sugar to fluffy perfection. The paddle creates more air incorporation than whisk attachments, which is crucial for that light, airy sponge.
If you don’t have a stand mixer, a hand mixer works in a pinch, but be prepared for more elbow grease and slightly less volume. 💪
For folding in the dry ingredients, I recommend a silicone spatula—it’s flexible enough to scrape every last bit of batter from the bowl without tearing the delicate sponge. A whisk comes in handy for combining the flour mixture before incorporating it into the wet ingredients.
Pro tip: Use a fine-mesh sieve to sift the flour directly into the mixer bowl to avoid lumps and ensure an even distribution.
Baking Essentials
A 15x10-inch jelly roll pan is essential for baking the sponge—it’s the perfect size for creating that long, rectangular shape that rolls into a log. Line it with parchment paper to prevent sticking, and trust me, you’ll want to use it again for future Swiss rolls or sheet cakes.
Preheat your oven to 350°F and use an oven thermometer to ensure accuracy—ovens can vary by 25°F or more, and precision is key here. 🌡️
For cooling the sponge, grab a clean kitchen towel and dust it generously with powdered sugar before rolling. This creates a smooth surface for rolling and prevents the sponge from sticking to itself. A sharp chef’s knife or serrated knife is also handy for trimming any uneven edges after baking.
I like to keep a small offset spatula nearby to help spread the ganache evenly during assembly.
Ganache Prep Gear
Your heatproof bowl and saucepan are the dynamic duo for making the ganache. I use a stainless steel saucepan for heating the cream because it conducts heat evenly, preventing scorching. A spoon or silicone spatula helps stir the ganache smoothly once the chocolate is melted.
For cooling, let it sit at room temperature—this is where patience pays off. If you’re short on time, a cooling rack speeds up the process, but avoid refrigerating it too soon or it’ll set too quickly. 🕒
To achieve that glossy finish on your Yule log, invest in a pastry bag with a star tip for decorating. This isn’t just for show—it helps pipe the whipped cream evenly over the log before dusting with cocoa powder.
A fine-mesh sieve is also a game-changer for dusting cocoa powder uniformly. For extra flair, a microplane lets you shave dark chocolate into delicate curls for garnishing. These tools might seem like extras, but they elevate your dessert from homemade to patisserie-worthy.
Assembly and Storage
For rolling the log, a rolling pin isn’t strictly necessary, but it helps create a smooth, even shape. Wrap the rolled log tightly in plastic wrap or aluminum foil to chill evenly in the refrigerator.
A sharp knife with a serrated edge is ideal for slicing the log—it glides through the layers cleanly without crushing them. I like to use a long, thin offset spatula to help lift the log onto a serving platter without breaking it. 🍴
If you’re prepping ahead, an airtight container keeps the log fresh for up to 3 days in the fridge. For reheating, a microwave-safe plate works for warming the ganache gently—just 10-15 seconds at a time until smooth.
A small whisk helps restore the ganache’s texture if it thickens too much. For serving, consider a wooden board or marble slab—they look elegant and keep the log stable while slicing.
Nutrition facts
Frequently asked questions
Can I make this Yule log without coffee?
Simply omit the 1 tbsp instant espresso powder from both the sponge and ganache. For extra depth, replace it with 1 tsp vanilla bean paste or an additional ½ tsp cinnamon. The chocolate flavor will still be rich, just without the coffee notes.
How do I prevent the sponge from cracking when rolling?
Bake the sponge until completely dry to the touch, then cool it fully before rolling. Dust the parchment with powdered sugar before baking to create a smooth surface. When ready to roll, use a clean kitchen towel to help shape it evenly. Never roll too tightly—leave room for the filling to expand slightly.
Can I substitute the dark chocolate chips?
Yes! Use 70% cocoa dark chocolate bars chopped into small pieces, or chocolate bars with nuts (like hazelnut) for variation. Avoid milk chocolate—it won't set properly in the ganache. For a smoother texture, melt the chocolate first and spread it over the sponge before rolling.
How far ahead can I prepare the Yule log?
Assemble the log completely (including ganache filling) up to 2 days ahead and store wrapped tightly in plastic at room temperature. For longer storage, refrigerate for up to 3 days. Bring to room temperature before serving—this prevents the ganache from becoming too firm.
What's the best way to slice the Yule log?
Use a serrated knife warmed under hot water, then wiped dry. Cut on a slight angle for decorative slices, and dip the knife between cuts to prevent sticking. Serve immediately—this reveals the beautiful layers and keeps the ganache soft. For extra presentation, dust each slice with cocoa powder right before serving.