
Desserts
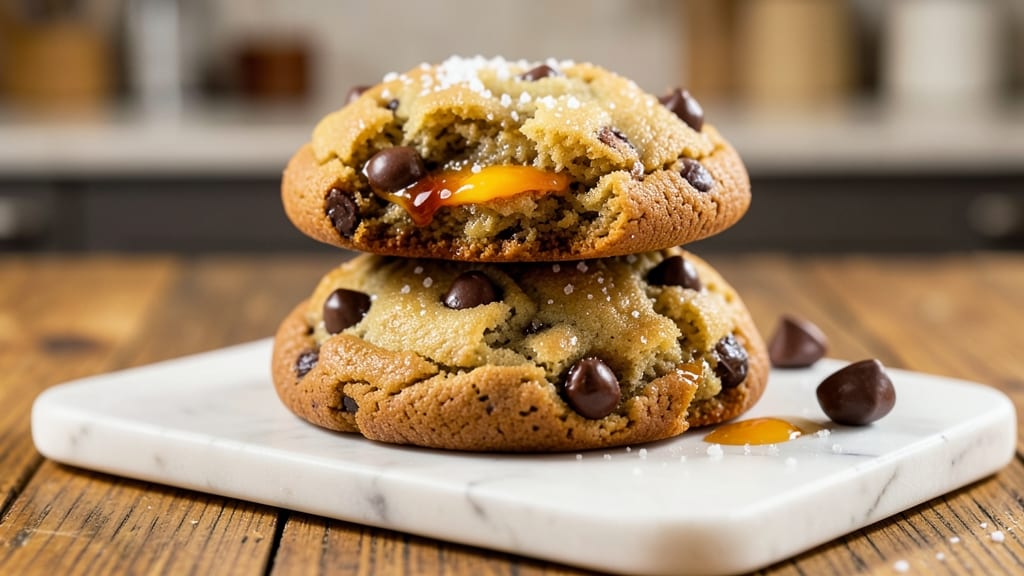
This basic chewy chocolate chip cookie recipe delivers the perfect balance of crisp edges and gooey centers—just like your favorite bakery, but with a foolproof home method. 💛 The secret lies in the right ratio of brown and white sugar, which creates that signature caramelized flavor and tender texture.
I've baked hundreds of batches, and this version never fails to impress, whether you're feeding a crowd or craving a single cookie after dinner.
What sets these apart is the 30-minute chill time for the dough, which prevents excessive spreading and allows the flour to hydrate properly. We're talking about cookies with warm chocolate rivers that stay melty even after cooling, thanks to high-quality chocolate chips.
The recipe uses baking soda for lift and cornstarch for that signature chewiness—no fancy ingredients, just reliable results.
By the time they emerge from the oven, you'll have golden-brown cookies with crisp edges that give way to soft, pillowy centers. The aroma alone will have everyone gathering in the kitchen, and the first bite delivers that perfect balance of sweetness and chocolatey richness.
These cookies stay fresh for days, making them ideal for holiday baking or satisfying afternoon cravings.
The best part? This recipe scales easily—double or triple the batch for parties, or keep it small for personal indulgence. Once you master this foolproof technique, you'll never go back to store-bought. Let's get baking!
Ingredients for basic chewy chocolate chip cookie
Pantry staples plus a few key tricks for bakery-style chewy chocolate chip cookies everyone will crave.
| Ingredient | Amount | Notes |
|---|---|---|
| Unsalted Butter 🧈 | 1 cup | Cold, cubed for even baking |
| Granulated White Sugar 🍚 | ¾ cup | Superfine preferred for smooth texture |
| Packed Brown Sugar 🍯 | ¾ cup | Light or dark, packed tightly |
| Large Eggs 🥚 | 2 whole | Room temperature for even mixing |
| Pure Vanilla Extract 🌿 | 2 tsp | High-quality, not imitation |
| All-Purpose Flour 🌾 | 2 ½ cups | Spooning and leveling for accuracy |
| Cornstarch 🌾 | ½ tsp | For signature chewiness |
| Baking Soda 🧂 | 1 tsp | For perfect lift and rise |
| Diamond Crystal Kosher Salt 🧂 | 1 tsp | Fine grain preferred |
| High-Quality Chocolate Chips 🍫 | 2 cups | Enjoy Life or Ghirardelli |
| Flaky Sea Salt 🧂 | ¼ tsp | For finishing cookies |
The butter is non-negotiable—use unsalted and let it sit out for 30 minutes before creaming. Land O'Lakes or Plugrá are my go-tos, but any good brand works. For the sugars, superfine white sugar dissolves faster, but regular granulated works if you pulse it in a food processor. Brown sugar should be packed firmly—no fluffy scooping. The chocolate chips make or break these cookies: Enjoy Life for allergy-friendly or Ghirardelli for premium flavor. Pro tip: chill your chips for 15 minutes before mixing—they won't melt into the dough.
No vanilla extract? Vanilla bean paste works perfectly, or scrape seeds from a pod into the dough. Short on cornstarch? Extra flour at 0.25 tsp mimics the texture, though it won't be identical. The baking soda and salt are your leavening duo—measure precisely. For a nutty twist, swap half the chocolate chips for chopped walnuts or pecans. And if you're gluten-free, use a 1:1 flour blend like Bob's Red Mill—just add an extra 0.5 tsp xanthan gum. The dough should be thick but pliable—if it's too sticky, chill it longer.
This dough needs 30 minutes in the fridge—no shortcuts. Store leftovers in an airtight container with parchment between layers for 5 days. For longer storage, freeze dough balls for 3 months—bake straight from frozen, adding 1-2 minutes. Once baked, let cookies cool on the tray for 5 minutes before transferring—the chocolate stays melty longer. Keep them in a cool, dark place to maintain that perfect chew. Double the batch? Use two cookie sheets and rotate pans halfway through baking for even golden edges.
Why You'll Love This Recipe
- No-Fuss Mixing: I swear by the "creamy dough hack"—just tossing the cold butter into the sugars with a fork until it’s pea-sized. No food processor, no stress, and the cookies still turn out chewy with that perfect crack.
- Butter-Sugar Magic: That creamy mix of brown and white sugar? It’s the secret. The brown gives caramel depth, while the white keeps it tender—plus, the butter stays soft just enough to keep every bite rich without burning.
- Party-Proof Staple: I’ve used these for holiday gifts, last-minute teacher treats, and even packed them in lunchboxes. They hold their shape, taste fresh for days, and honestly? People always ask for the recipe.
- Budget Baking Win: Five ingredients, zero weird shortcuts. The butter and sugars stretch far, and the eggs add richness without costing a fortune. Plus, they freeze like a dream—so you’re always covered.
Step-by-step instructions for perfectly chewy chocolate chip cookies
Here's how to create cookies with that signature chew and molten chocolate—every time.
🍳 Step 1: Cream Butter and Sugars to Fluffy Perfection
In a stand mixer fitted with the paddle attachment, combine the 1 cup Unsalted Butter (cold and cubed) with the 0.75 cup Granulated White Sugar and 0.75 cup Packed Brown Sugar. Mix on medium speed for 3-4 minutes until light and fluffy—you'll see the mixture nearly double in volume and turn pale. This step is non-negotiable for those signature crackly tops and chewy centers.
I like to press down on the butter mixture with a spatula halfway through to break up any large lumps. You're looking for a texture that's smooth but still slightly ribbed—this ensures proper aeration. If you're mixing by hand, use a wooden spoon and work it for 5-6 minutes until it's completely creamy. The butter should be just soft enough to leave a slight indentation when pressed, but not melted.
👨🍳 Step 2: Add Eggs and Vanilla for Richness
Add the 2 whole Large Eggs one at a time, mixing on low speed for 30 seconds after each addition. The mixture might look slightly curdled at first, but don't worry—it will come together. Add the 2 tsp Pure Vanilla Extract and mix for another 10 seconds until fully incorporated. This is where the flavor really starts to develop, so don't rush it.
Here's the thing—room temperature eggs mix more smoothly and create a more uniform dough. If your eggs are straight from the fridge, let them sit in warm water for 5 minutes first. The vanilla extract should be high-quality; imitation just won't give you that authentic depth of flavor. Mix until everything is completely combined, but don't overdo it—we're not making cake batter here.
👨🍳 Step 3: Combine Dry Ingredients for Structure
In a separate bowl, whisk together the 2.5 cups All-Purpose Flour, 0.5 tsp Cornstarch, 1 tsp Baking Soda, and 1 tsp Diamond Crystal Kosher Salt. Sift if your flour isn't sifted—this prevents lumps and ensures even distribution. With the mixer on low speed, gradually add the dry ingredients to the wet mixture, mixing just until combined. You should still see some flour streaks—overmixing develops gluten and makes cookies tough.
This is where the magic happens for that signature chew. The cornstarch creates that irresistible texture, while the baking soda gives the perfect lift. Once the dry ingredients are incorporated, remove the bowl from the mixer and fold in the 2 cups High-Quality Chocolate Chips using a silicone spatula. Make sure they're evenly distributed—you want pockets of chocolate in every bite. Don't skip this step; it makes all the difference in the final texture.
⏰ Step 4: Chill the Dough (This Changes Everything!)
Cover the dough bowl with plastic wrap and refrigerate for at least 30 minutes (I prefer 1 hour or even overnight). This chilling step is absolutely critical—it prevents the cookies from spreading too much in the oven and allows the flour to fully hydrate. Cold dough also means the cookies hold their shape better, resulting in thicker cookies with crispy edges and gooey centers.
I know it seems counterintuitive to wait, but trust me on this. The butter will firm up during chilling, which prevents excessive spreading. If you're in a hurry, you can freeze the dough for 20 minutes as a shortcut, but chilling overnight gives the best results. The dough should be firm but still pliable when you're ready to bake—if it's too soft, chill it a bit longer.
🔥 Step 5: Bake to Golden, Pillowy Perfection
Preheat your oven to 350°F and line two baking sheets with parchment paper. Using a 2-tablespoon cookie scoop (or a spoon), portion the chilled dough into 2-tablespoon balls and place them 3 inches apart on the prepared sheets. I like to use a scoop for uniform size, but if you're eyeballing it, aim for about 1.5 ounces per cookie for that perfect balance of chew and spread.
Bake for 11-13 minutes until the edges are golden brown but the centers still look slightly underdone. The cookies will continue cooking on the hot pan after you remove them from the oven. Here's the crucial part: they should pull away from the parchment paper slightly at the edges but still look soft in the middle. If you bake them too long, they'll lose that signature chew. Let them cool on the baking sheet for 5 minutes before transferring to a wire rack to set completely.
Pro Tips For Making Basic Chewy Chocolate Chip Cookie
- CREAM BUTTER SLOWLY: I learned this the hard way—dumping cold butter into sugar and eggs at once just makes a greasy mess. Instead, soften the butter first (it should dent when pressed, not be fully melted), then mix it into the sugars gradually while stirring. This creates a smoother dough and prevents lumps that turn into weird, dry pockets in your cookies.
- USE COLD EGGS: Room-temperature eggs work, but cold ones actually help. Pull them straight from the fridge, crack them gently into a bowl, and let them sit for just 10 minutes before mixing. Cold eggs keep the dough from spreading too much, giving you thicker, chewier cookies—especially important when you’re not using flour with extra protein.
- SKIP THE OVERMIXING: The moment your dough holds together when pressed, stop. Overmixing develops gluten, and that’s the enemy of chewy cookies. I used to think more mixing = better texture, but now I just fold in the chocolate chips and call it done—this keeps the cookies tender and gooey in the center.
- CHILL DOUGH UNTIL FIRM: Sounds weird, but it works: wrap your dough in plastic and refrigerate for at least 1 hour (or up to 48 hours). This isn’t just about convenience—it lets the flour absorb moisture, prevents excessive spreading, and makes the cookies crispier at the edges while staying soft inside. Yes, even if you’re impatient like me.
Storing and reheating this basic chewy chocolate chip cookie
Refrigerator Storage
Store baked cookies in an airtight container with parchment paper between layers to maintain freshness for up to 5 days. I always let them cool completely first—this prevents moisture buildup that makes them soggy.
The key is keeping them at room temperature (not in the fridge) unless you're in a humid climate, where they'll stay chewy for an extra day. 💛
Freezing Dough Balls
For maximum freshness, freeze the dough in 1.5-ounce balls on a parchment-lined tray for 1 hour before transferring to a ziplock bag. This prevents sticking and makes them easy to grab.
Cook straight from frozen, adding 1-2 extra minutes to the baking time. The dough keeps for 3 months this way—perfect for holiday baking prep.
Reviving Stale Cookies
If your cookies lose their chew, revive them by placing them in a 350°F oven for 3-5 minutes with a tablespoon of water in the pan. The steam softens them while the heat crisps the edges.
For extra moisture, brush with melted butter before reheating. I also love microwaving 1-2 cookies for 10 seconds with a damp paper towel for instant warmth.
Portion Control Tips
Use a cookie scoop to portion reheated cookies—this ensures even size and prevents overcrowding. For microwave reheating, cover cookies with a damp paper towel to prevent drying. I find that 2-3 minutes in the oven works best for restoring that bakery-fresh texture without burning the edges.
Always reheat in batches to maintain even heat distribution.
Storage Containers
Glass containers with snap-on lids are ideal for storing cookies—they're airtight and easy to clean. Avoid plastic containers, as they can trap moisture and make cookies stale faster.
For long-term storage, I recommend vacuum-sealed bags to extend freshness for up to 2 weeks. Label everything with the date to track freshness.
Make-Ahead Pro Tips
Double the dough and freeze half—this saves time when cravings strike. When ready to bake, simply thaw the dough balls for 15 minutes at room temperature. For a shortcut, bake cookies straight from frozen, adding 2 minutes to the baking time.
I also like to portion dough into mini cookie sizes for easy single-serving reheating later. 🔥
Nutrition facts
Frequently asked questions
Why does my dough keep spreading too much?
The most common cause is skipping the 30-minute chill or using butter that's too soft. Cold dough prevents excessive spreading and maintains shape. Always use cold cubed butter and let the dough rest—this is non-negotiable for thick, chewy cookies!
Can I substitute brown sugar with white sugar?
You can, but your cookies will lose that signature caramelized flavor and chew. For every 1 cup brown sugar omitted, replace with ¾ cup white sugar plus 1 tablespoon molasses to mimic the moisture and depth. The texture will be slightly crispier without the brown sugar's moisture.
How do I get perfectly crisp edges while keeping the centers soft?
Bake at 350°F for 11-13 minutes until edges are golden but centers still look slightly underdone. The cookies will firm up as they cool. For extra crisp edges, place baking sheets on the middle rack (not top) and rotate pans halfway through. Let them cool 5 minutes on the tray before transferring.
What's the best way to store these cookies for maximum freshness?
Keep them in an airtight container at room temperature for 5 days, with parchment between layers to prevent sticking. For longer storage, freeze dough balls for 3 months—bake straight from frozen, adding 1-2 minutes. Never refrigerate baked cookies unless you're in a humid climate.
Can I make these cookies gluten-free?
Yes! Use a 1:1 gluten-free flour blend (like Bob's Red Mill) plus an extra 0.5 tsp xanthan gum per cup of flour. Chill the dough longer (1 hour) since gluten-free dough spreads more. Expect slightly denser cookies but with the same chewy texture.